Recover Deleted Entities From Trash
Use Trash to find and restore deleted entities in Nexus Repository during the retention period. This feature is available to administrators in Nexus Repository licensed entitlements in both self-hosted and Cloud deployments.
Trash shows deleted hosted repositories, components and assets entities that are still within the retention period. You can filter deleted entities by type, format, repository, and the user who deleted them, or use the browse-all endpoint to retrieve deleted entities across supported types.
Items remain in Trash for a retention period of 30 days by default. Administrators can restore an item while it remains in Trash. After the retention period expires, Nexus Repository automatically processes the item for removal.
How Trash Works
Trash applies to hosted repositories and the content they contain. It supports the following entity types:
Entity Type | Behaviour |
|---|---|
Repository | The hosted repository is moved to Trash and is no longer available as an active repository. |
Component | The component and its associated assets are moved to Trash. |
Asset | The individual asset is moved to Trash. |
When an eligible entity is deleted:
Nexus Repository moves the entity to Trash.
The entity no longer appears in its normal active views.
The entity remains recoverable until its retention period expires.
An administrator can restore the entity from Trash during the retention period.
After the retention period expires, a scheduled Purge task removes the corresponding database records and soft-deletes the associated blob store records. This does not immediately reclaim the blob storage space. The soft-deleted blob store records are removed later when the blob store compaction task runs.
Note
Cleanup policies and other system-driven cleanup operations do not add deleted content to Trash.
You cannot create a repository with the same name as a repository that is currently in Trash. Restore the repository or wait until it is removed from Trash before reusing the name.
Write Policy And Trash
When content is in Trash, Nexus Repository treats its repository path as available for upload. The repository write policy determines whether you can upload new content to that path.
Allow redeploy: The upload succeeds and replaces the content in Trash. The uploaded content becomes the new live version.
Disable redeploy: The upload succeeds because this policy prevents overwriting live content, not content in Trash.
Read-only: Uploads are not permitted. The content remains in Trash and can be restored during the retention period.
Note
After you upload new content to a path associated with content in Trash, you cannot restore the previous content from Trash. Restore the content before uploading the new content.
Configure Retention Period
The default retention period is 30 days. The minimum configurable retention period is 1 day, and the maximum is 30 days. For self-hosted deployments, use the following property to configure the retention period in nexus.properties:
nexus.trash.retentionDays
Restart Nexus Repository for changes to take effect.
Find Items in Trash
Select Trash from the Nexus Repository navigation menu to view deleted items. Use the search field and available filters to narrow the list.
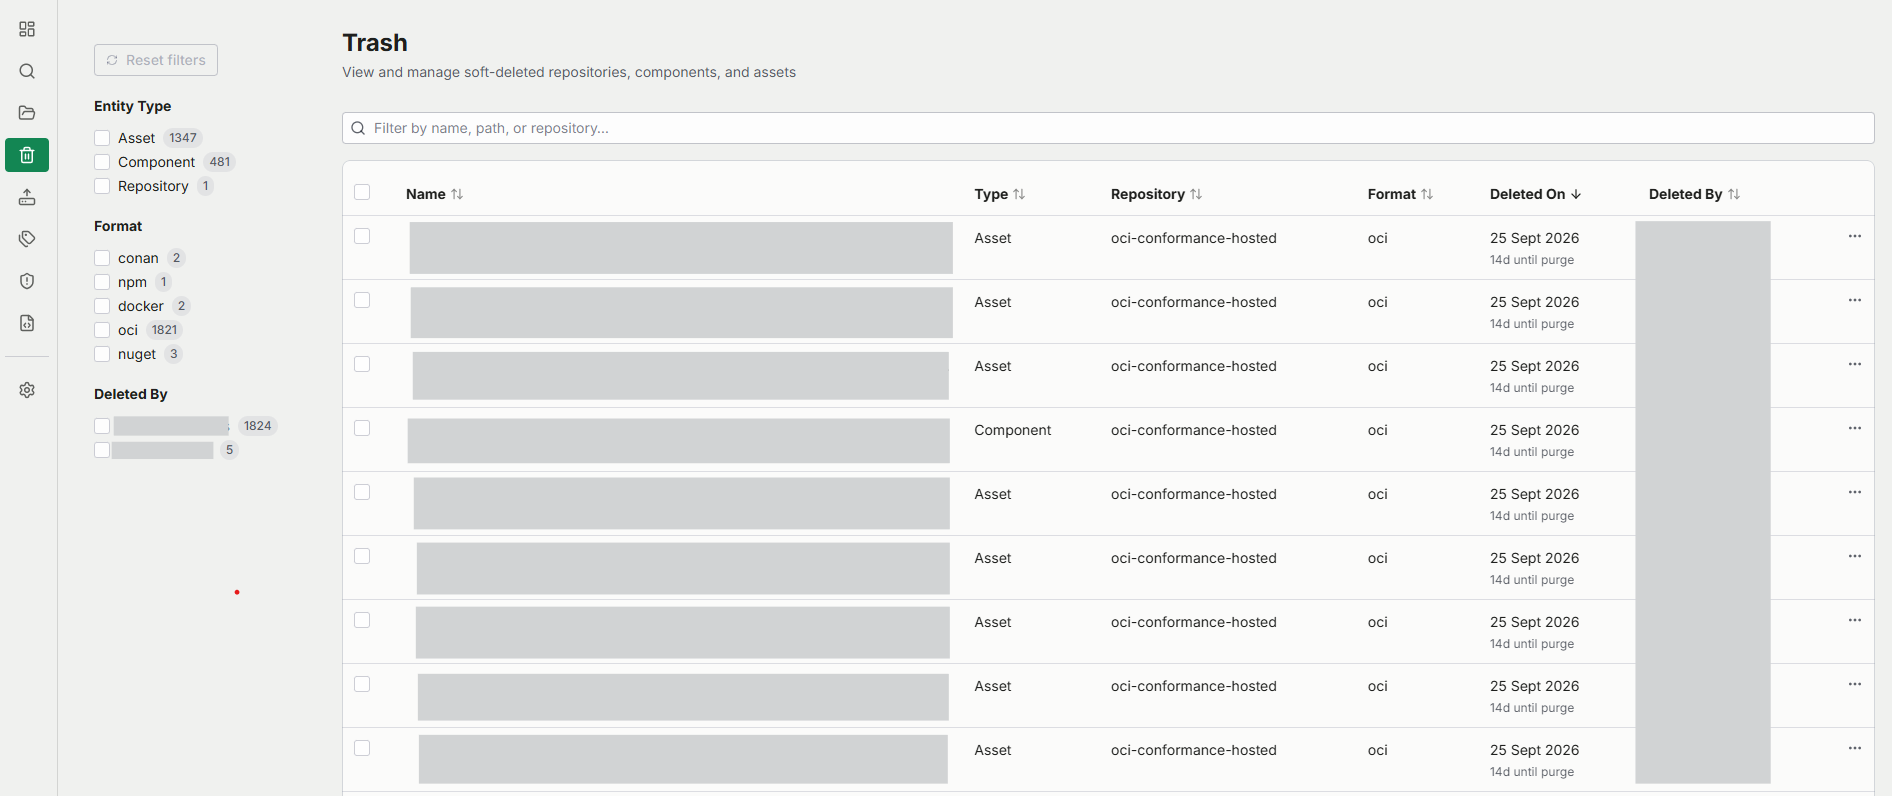
The available filters are based on the items currently in Trash. You can filter by entity type, format and the user or process that deleted the item. The number next to each filter value shows how many deleted entities match that value. The table also shows when each item was deleted and how long it remains recoverable.
Components can contain multiple assets. When a component and its assets are moved to Trash together, Trash presents the component as the recoverable unit instead of listing each child asset as a separate top-level item.
The Trash table shows the following details for each deleted entity:
Column | Description |
|---|---|
Name | Name or path of the deleted entity. |
Type | Entity type, such as Asset, Component or Repository. |
Repository | Repository associated with the deleted entity. A dash indicates that the value does not apply. |
Format | Format associated with the deleted entity. A dash indicates that the value does not apply. |
Deleted On | Date when the entity was deleted and the remaining time until automatic purge. |
Deleted By | User or system that deleted the entity. |
You can sort columns that show a sort indicator. Use sorting with filters when you need to find deleted entities by name, type, repository, format, deletion date or user.
Restore Deleted Entities
Restore a deleted entity when you want to make it active again. Restored entities are removed from Trash and return to the appropriate Nexus Repository views.
Take the following steps to restore entities:
Select Trash on the navigation pane.
Select one or more entities that you wish to restore. The maximum bulk restore limit is 250.
Select Restore.
Confirm the restore.
Restoring a component also restores the assets that were moved to Trash with that component. Restored content returns to its active repository and becomes available through the applicable repository views and workflows.
Note
Restoring a hosted repository does not automatically add it back to any group repositories that it belonged to before deletion. Add the restored hosted repository to the required group repositories again.
Rebuild Trash Index
When you migrate the database of a self-hosted Nexus Repository instance using the database migrator, deleted items in Trash are preserved in the destination database. However, the Trash browse index is not migrated.
On the first startup after migration, Nexus Repository automatically runs the Rebuild Trash Index task to recreate the index. If the task fails or does not complete, the Trash page appears empty even though the deleted items remain in the database. To repopulate the Trash browse index manually, run the Rebuild Trash Index task. For the general procedures on configuring a task, see Tasks.
Purge Deleted Entities
Purge a deleted entity when you want to permanently remove it from Nexus Repository. After an entity is purged, you cannot restore it from Trash. You can purge up to 250 entities in a single bulk operation.
Take the following steps to purge entities:
Select Trash on the navigation pane.
Select one or more entities that you want to purge.
Select Purge.
Confirm the purge.
Automatic Removal from Trash
The Purge task automatically processes entities that reach the end of their retention period. When the task processes an expired entity, Nexus Repository removes the corresponding database records and marks the associated blobs for deletion. The blob data continues to occupy storage until blob store compaction removes it.
Administrators can review and configure the Admin - Purge expired Trash items task from Settings → Tasks. For more details on configuring Task fields, see Tasks.