Guide to Removing Malware
This document explains how to remove malware components from a repository using the Repository Firewall. This guide assists Nexus Repository users who see the malware warning banner as of Nexus Repository release 3.73.

Requirements
Users of this guide require permission to access both the Nexus Repository and the Repository Firewall.
Repository Firewall must have the reference policy
Security-Maliciousset to fail. This is the default configuration.Repository Firewall must be configured to audit all proxy repositories or some malware components may be missing from the report.
The Nexus Repository task,
Automatic Malware Management, must be enabled and run against your proxy repositories.See the Nexus Repository documentation on Malware Risk for details.
Users need access to delete components from the repositories where the malware is located.
See the Malware Risk Dashboard for details on when a component may be shown as quarantined in Repository Firewall but is still found in the repository.
Note
When a malware component has been discovered in your repositories and has not been quarantined by the Repository Firewall, the component has likely been downloaded into your development environment.
Sonatype is not able to perform forensics in your environment, but InfoSec should be alerted.
Find malware components and remove them
Use the following steps to find and remove malware from your proxy repositories.
Go to the Repository Firewall dashboard
The Firewall Dashboard can be found using the solution switcher.
Select the
Security-Maliciouspolicy from thePolicy NamefilterThe number shown in the banner may differ as some components may be counted more than once.
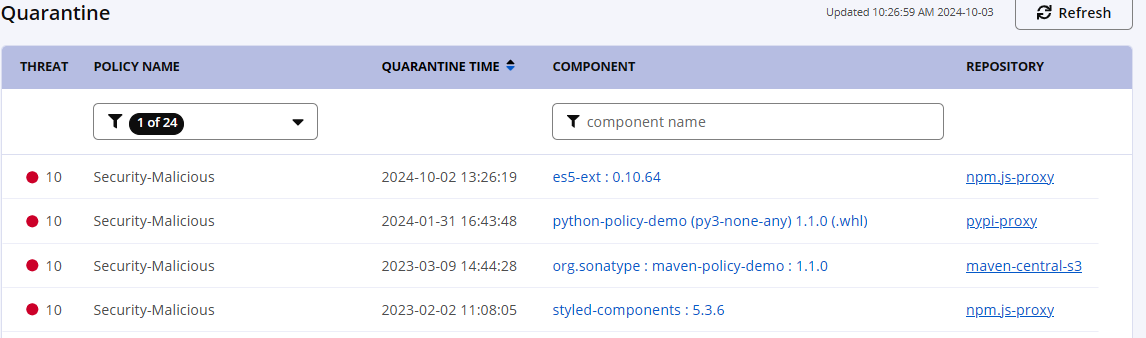
Finding the identified malware in the repository
From Nexus Repository, use the search to find the components matching the
NameandVersionfrom the Repository FIrewall Dashboard.
Delete the component
Select the malware component from the search results, then delete the component using the
Delete Componentbutton.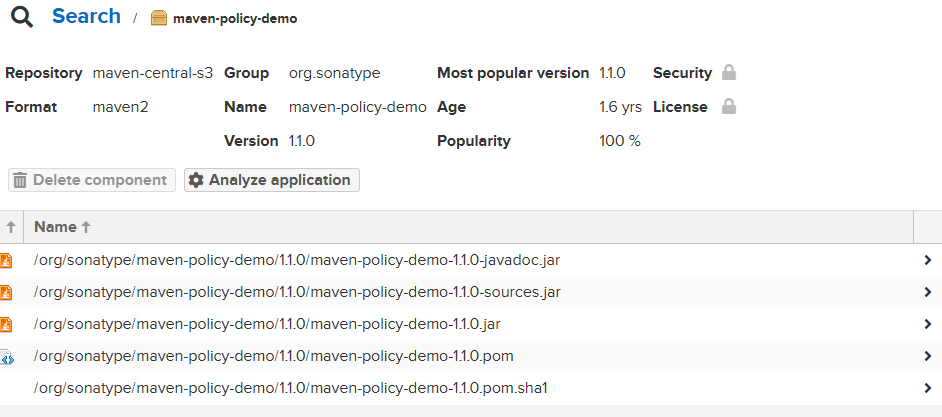
Allow for up to 24 hours for the Repository Health Check to remove the banner
After removing the components from the proxy repository, the banner may take up to 24 hours to update the warning. The banner disappears once all components have been removed from the proxy repositories.
See Repository Health Check to learn more