Waiver Management
Manage waivers from the violations details on the Dashboard or tab, or directly from the waiver dashboard.
Violation Details page - click on any violation in the dashboard violation view.

Policy Violations view - click on a violation in the application composition report.

Waiver Permissions
The ability to add waivers is limited based on the permissions included in the user's role.
The Waive Policy Violations permission is needed to manage waivers. Users without these permissions have the option to request a waiver by sharing an API call with a user who has the correct permissions.
Applicable Waivers for Violation
Clicking on the Manage Waivers button from the Policy Violations tab inside an application composition report will navigate to the Waivers for Violation page.
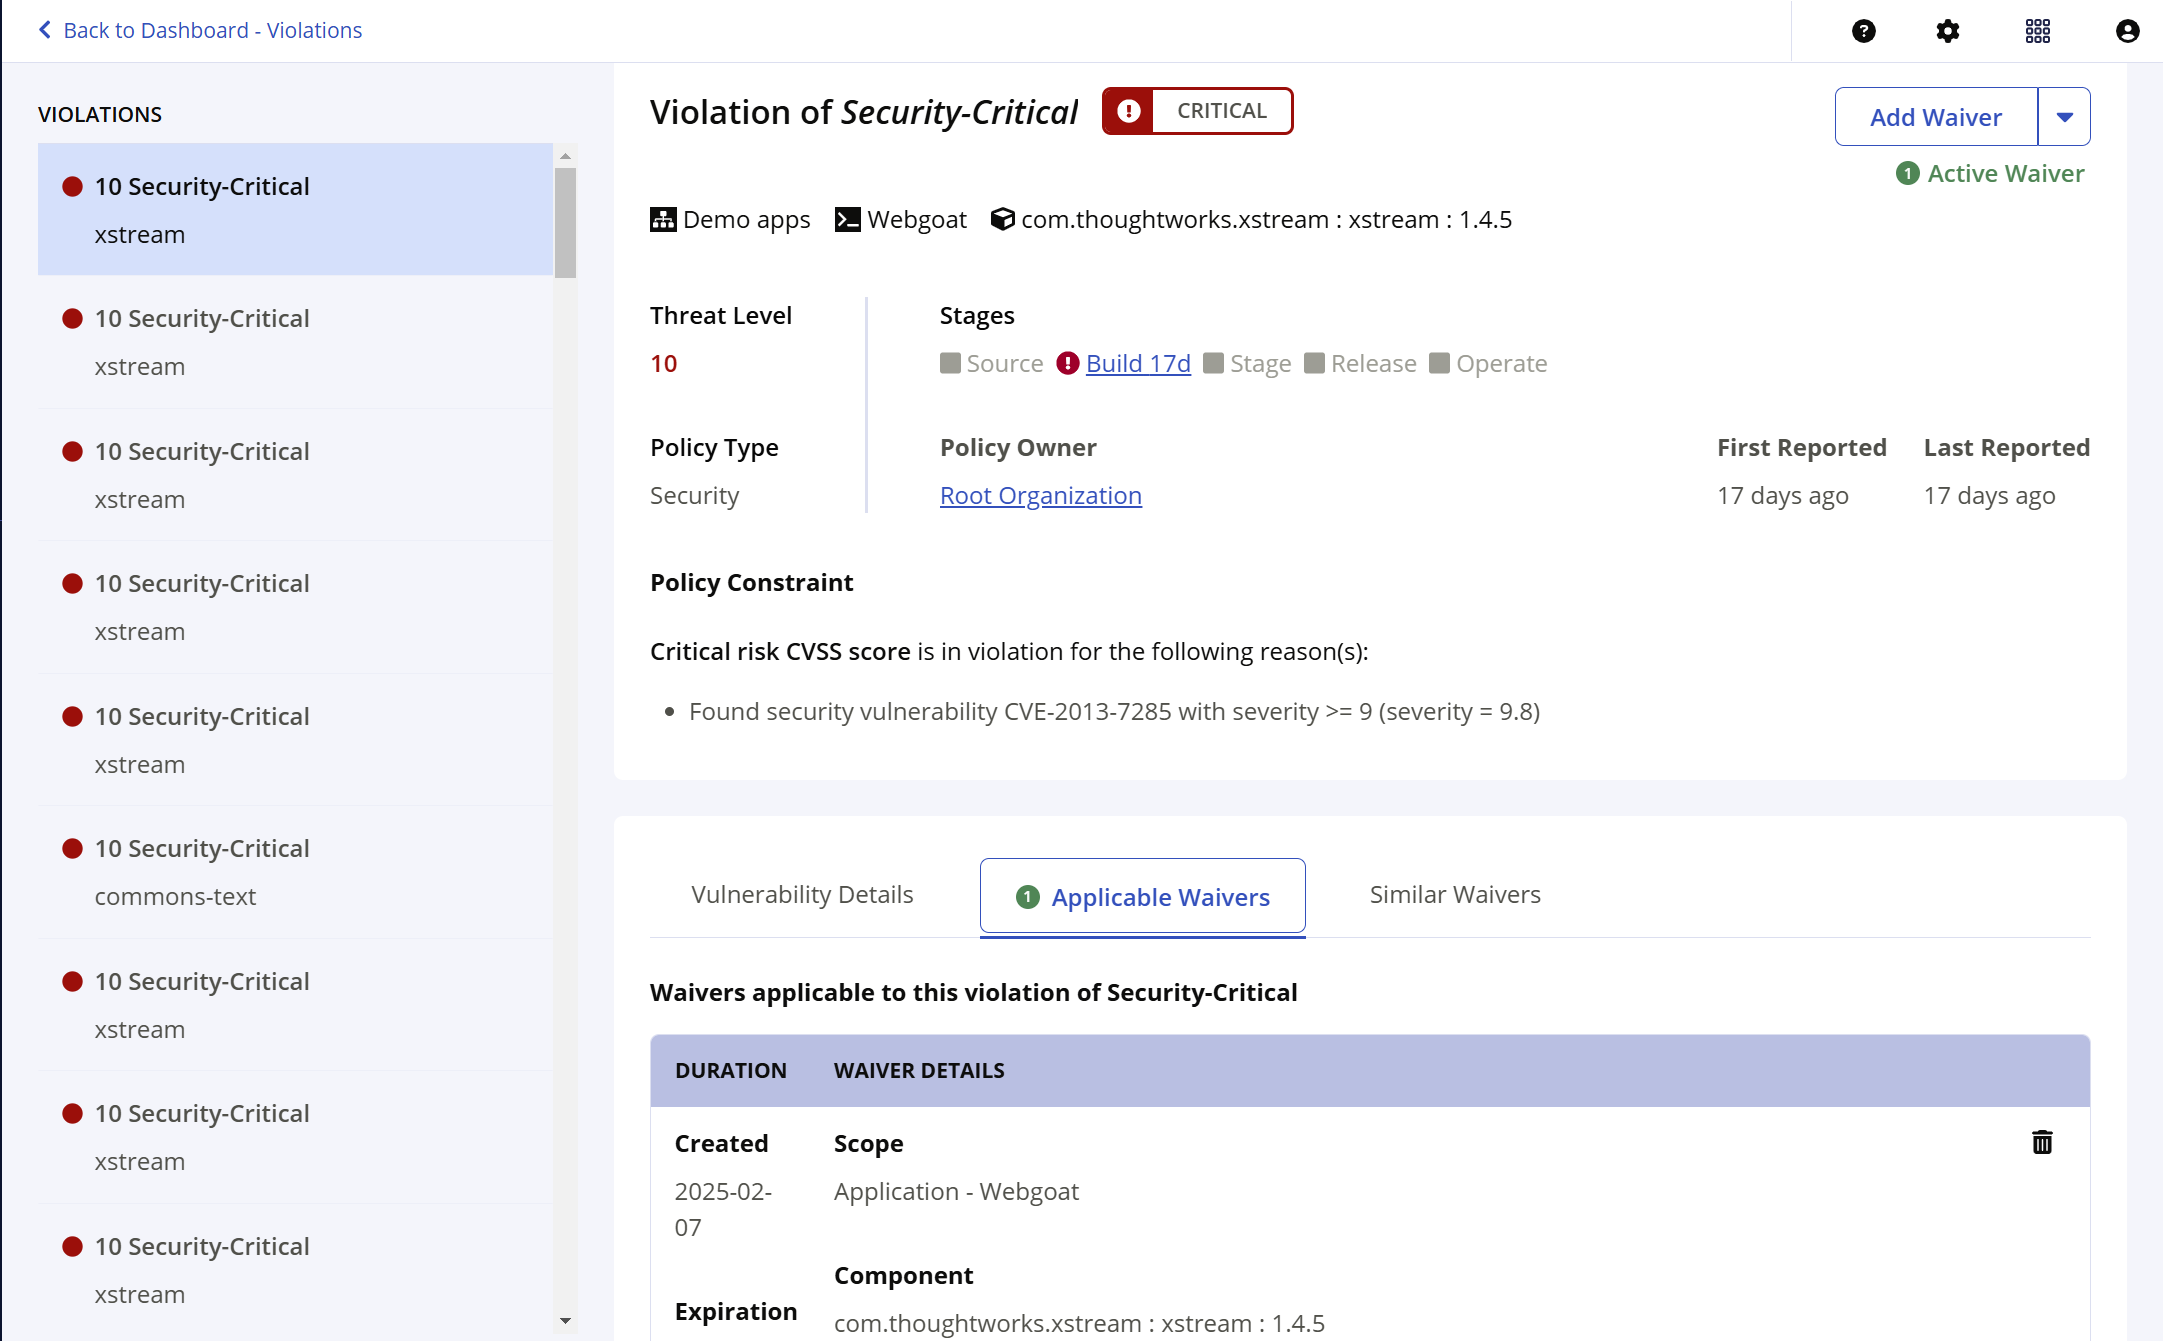
A summary of the violation details, along with a list of any applicable and similar waivers is displayed.
Viewing Waivers from the Violations Page
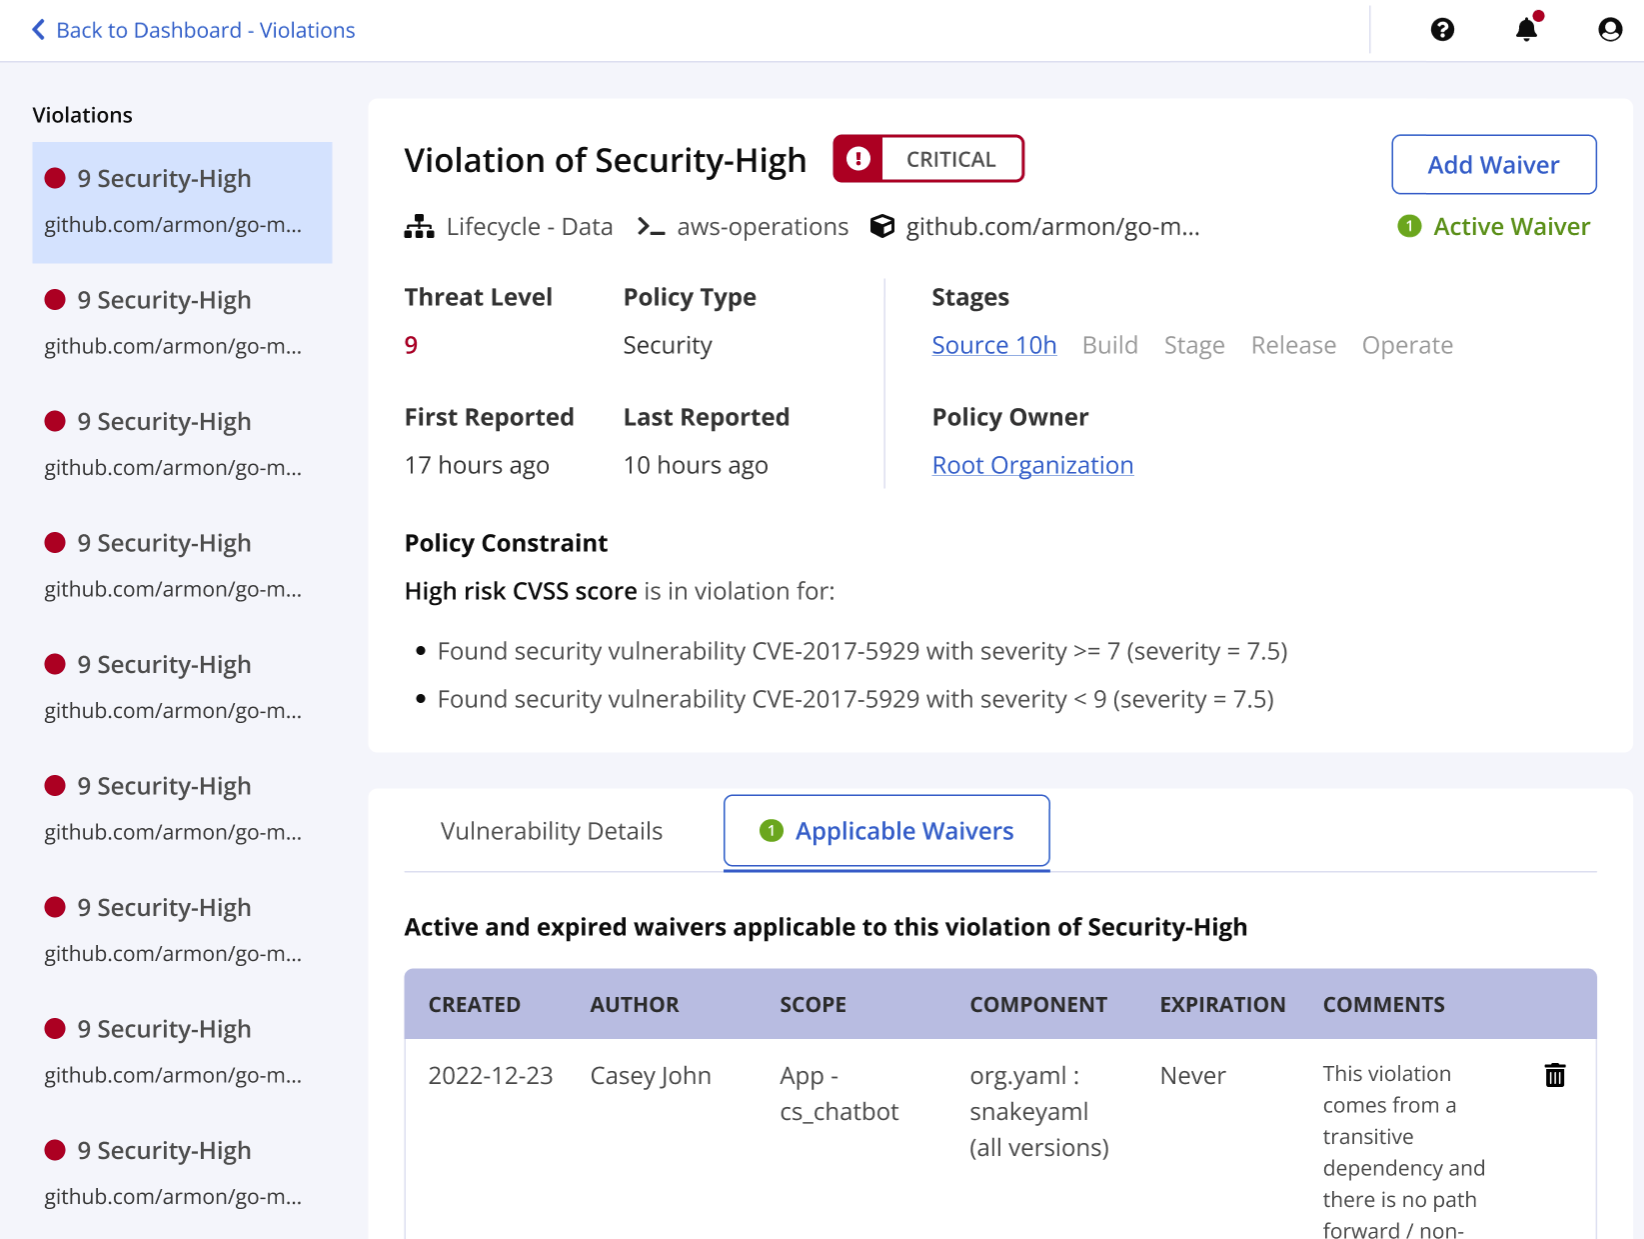
Click on a violation from the violations page on the Dashboard. All applicable waivers to this violation will appear under the violation details. Click on the Add Waiver button (based on your permissions), to add a new waiver.
Viewing Waivers from the Reports Page
The Reports page displays violations aggregated by component. The Waived Violation indicator will appear for existing waivers.
The Reports page displays application reports for the source, build, stage release and release stages. Click on the Reports link under the application stage column to view the application report page. It displays violations aggregated by components.
Click on a component row.
Select the Policy Violations tab.
Click on the violation to view the violations details pane. It shows the violation details, vulnerability details (if applicable), Applicable Waivers and Similar Waivers.
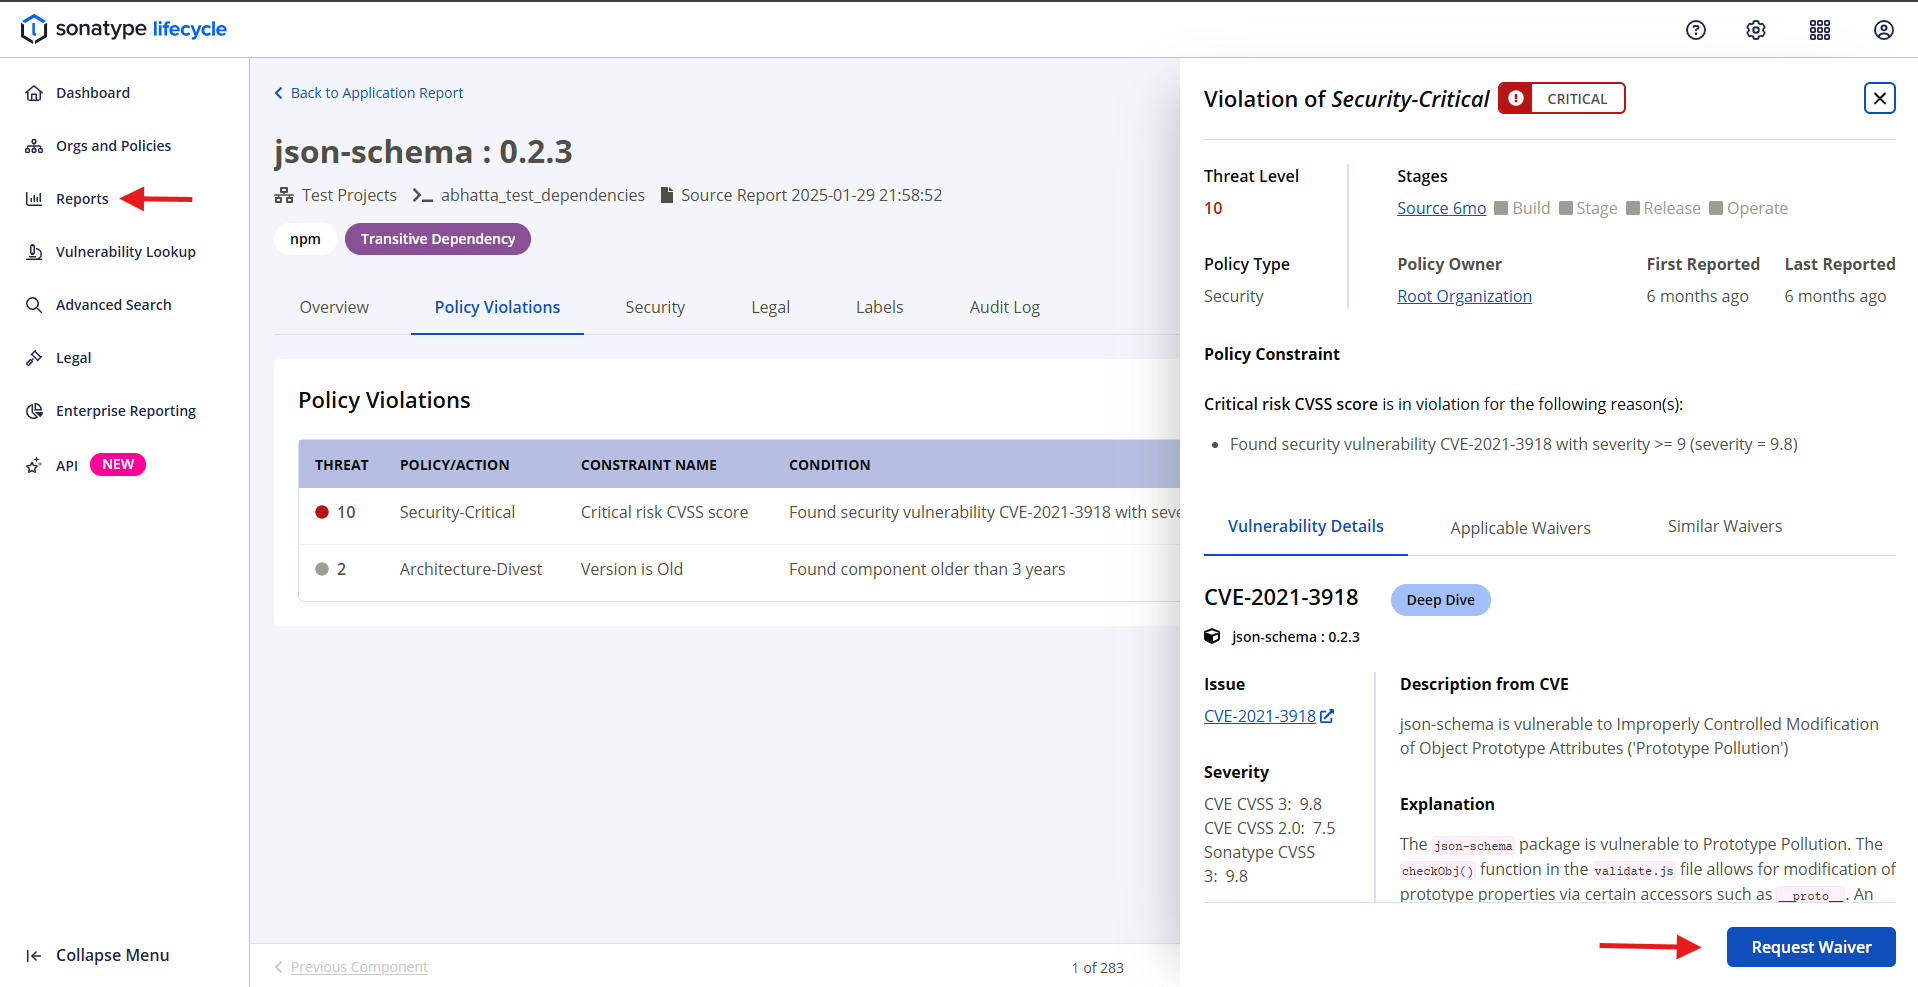
Click on the Add Waiver or Request Waiver button (based on your permissions) to add or request a new waiver.
Viewing Waivers from the Waivers tab
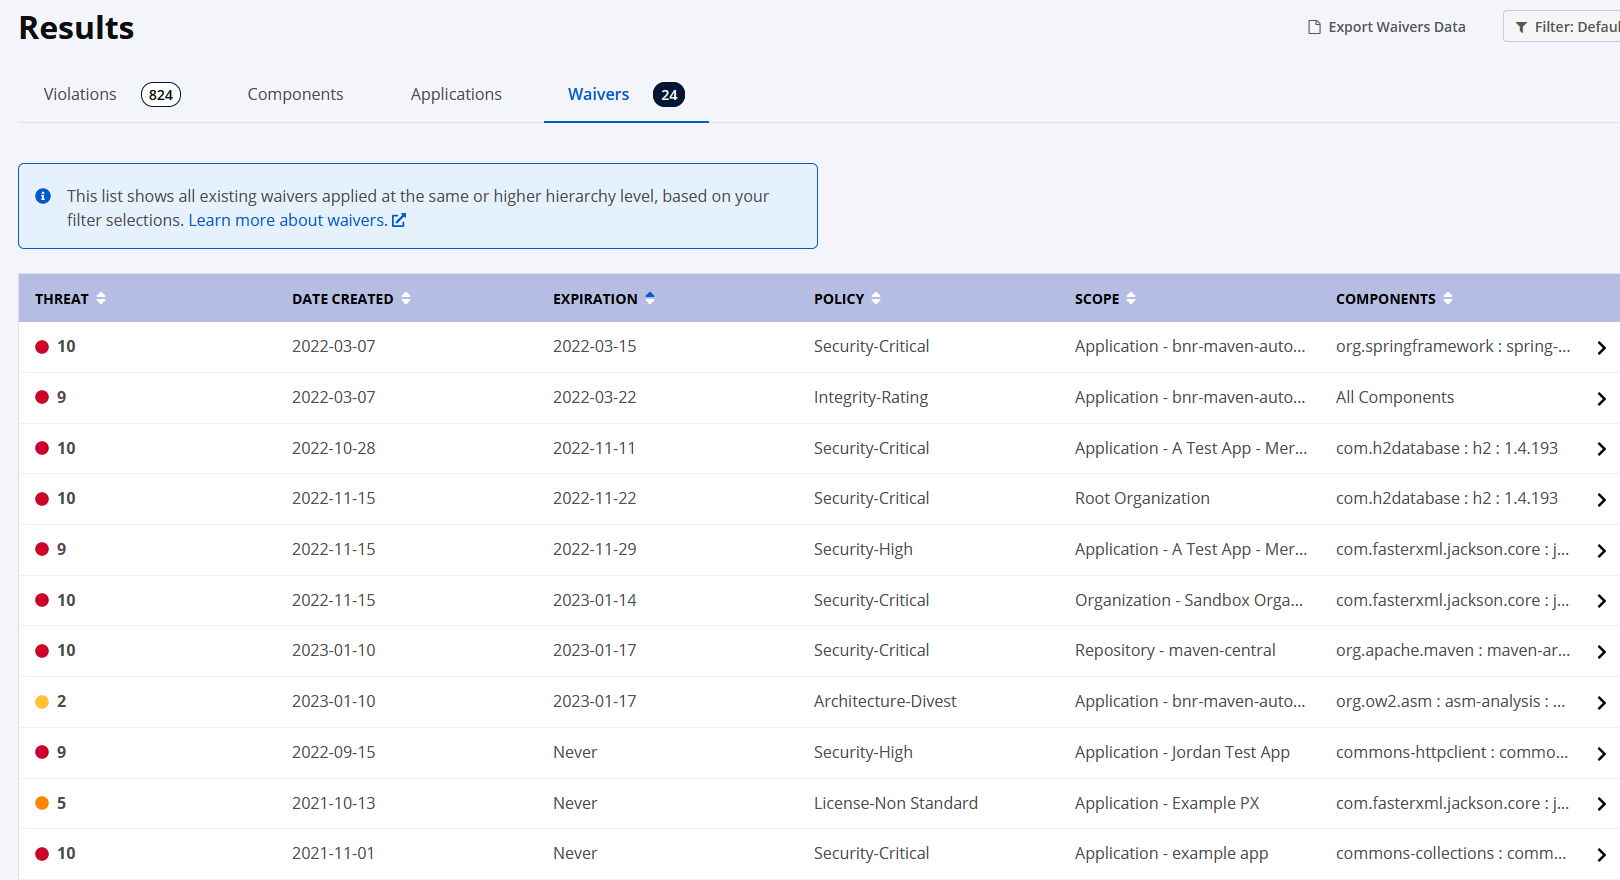
To view a list of waivers from the Dashboard, click the Waivers tab.
This shows a list of waivers from applications or organizations you have permission to view. Click on any row to go to the Waiver Detail View and see more details about the waiver.
 |
To view applicable waivers from the Dashboard, click on a violation in the Dashboard. To add new waivers, click on the Add Waiver ,
Filtering Dashboard for Stale Waivers
Filter your results by clicking the Filter button on the right side. By default, the list includes all waivers, including stale and expired waivers. To limit your results to just active and stale waivers, use the Expiration Date filter and select any option other than all.
Adding a Waiver
Click on the Add Waiver button in the Applicable Waivers table to go to the Add Waiver page.
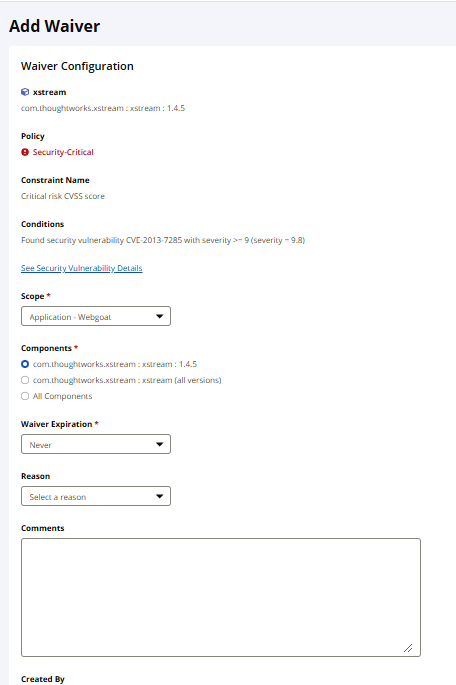
The component's name and coordinates, the selected policy, and severity are shown here. You'll also see the Constraint Name and the Conditions that the waiver will cover.
Hierarchy Scope
Choose the scope where the waiver is applied.
Application - This current application
Organization - This application's parent organization and all organizations and applications under it.
Root Organization - All applications and organizations
For Firewall waivers, choose from the current Repository, All Repositories, or Root Organization.
Component Scope
Choose the component scope for which the waiver applies to. All versions and all components include future components which have not been released.
Component Name - hash matching to this specific version
Component Name (all versions) - name-based wild card matching to all current and future versions of that component.
All Components - any current and future components matching the violation criteria
Waiver Expiration
Select an expiration duration for this waiver. Waivers expire at the end of the given day.
Never - the waiver will remain in place until deleted
(7, 14, 30, 60, 90, 120) days - number of days until the waiver expires
Custom - configure a specific date for the waiver to expire. Must be later than the current date
Waiver Reasons
Select a Waiver Reason for this waiver. Available values are detailed below
Reason | Description |
|---|---|
Acknowledged Violation | The risk does not meet the threshold for immediate action or it cannot be prioritized by the development teams due to other deliverables. This reason is best used when you need to waive a violation for a short period of time so that the development team can appropriately asses the violation and plan remediation actions. It could also be used as part of an automated waiver to accept risk for violations that do not meet your organization's threshold for development disruption. |
Mitigated Externally | The violation was remediated via external means (e.g. changing configuration options or network options to mitigate a vulnerability). |
No Upgrade Path | There is no upgrade path available for the violating component. |
Not Reachable | Reachablity analysis, or your analysis, has determined that the vulnerability is not reachable, so the probability of exploitation is lower. |
Not Exploitable | The vulnerability that is triggering this violation is not exploitable in the implementation environment. For example, if the vulnerability requires a network connection and your application is running in an air-gapped environment it would not be exploitable. |
Researching | Research is in progress on the impact of this violation. |
Other | For all use cases not covered by the above. |
Comments
Add reference details to the waiver. Common use cases:
justification for the waiver
validation and testing process
reference links for additional documentation
Requesting a Waiver
If you do not have permission to create waivers, you can send a request to the designated approver. For more details, see Requesting a Waiver section.
Removing a Waiver
To delete a waiver, either:
Go to the Waiver Detail View and click Delete Waiver at the bottom right.
Go to the Waivers for Violation Page and click the Delete icon on the right side of a row.
Go to the View Existing Waivers pullout and click the Delete icon on the right side of the row.