p2 Repositories
P2 is a technology for provisioning and managing Eclipse- and Equinox-based applications. Use p2 to install or manage any aspect of your application, from the physical plugins and native code to the configuration of the installed software: file permissions, command line arguments, etc.
Installation with p2 does not consist simply in adding or removing files in the file system, but more generally the sequence of events that must occur to lay down and configure a system that is ready to run.
Supported Features
Repository types - Proxy
Simple p2 plugin repositories
Composite p2 plugin repositories
Update sites
Features, Plugins, Binary types of files
Eclipse IDE version 4.2.2 or later (support for earlier versions is not guaranteed)
Auto-blocking unreachable remote repositories is disabled by default due to connection problems.
Proxying p2 Repositories
You can set up a p2 proxy repository to access a remote repository location, for example, to proxy the Eclipse Foundation repository.
To proxy a p2 repository, create a new p2 (proxy) as documented in Repository Management.
Minimum steps are:
Define the proxy name.
p2-proxy
Define URL of the remote storage.
https://download.eclipse.org/releases/2025-06
Select a blob store
Browsing p2 Repositories and Searching Packages
You can browse p2 repositories in the user interface inspecting the components and assets and their details, as described in Browsing Repositories and Repository Groups.
Searching for p2 packages can be performed in the user interface, too. It finds all packages that are currently stored in the repository manager, as described in Searching for Components.
Configuring the Eclipse IDE to use Nexus Repository
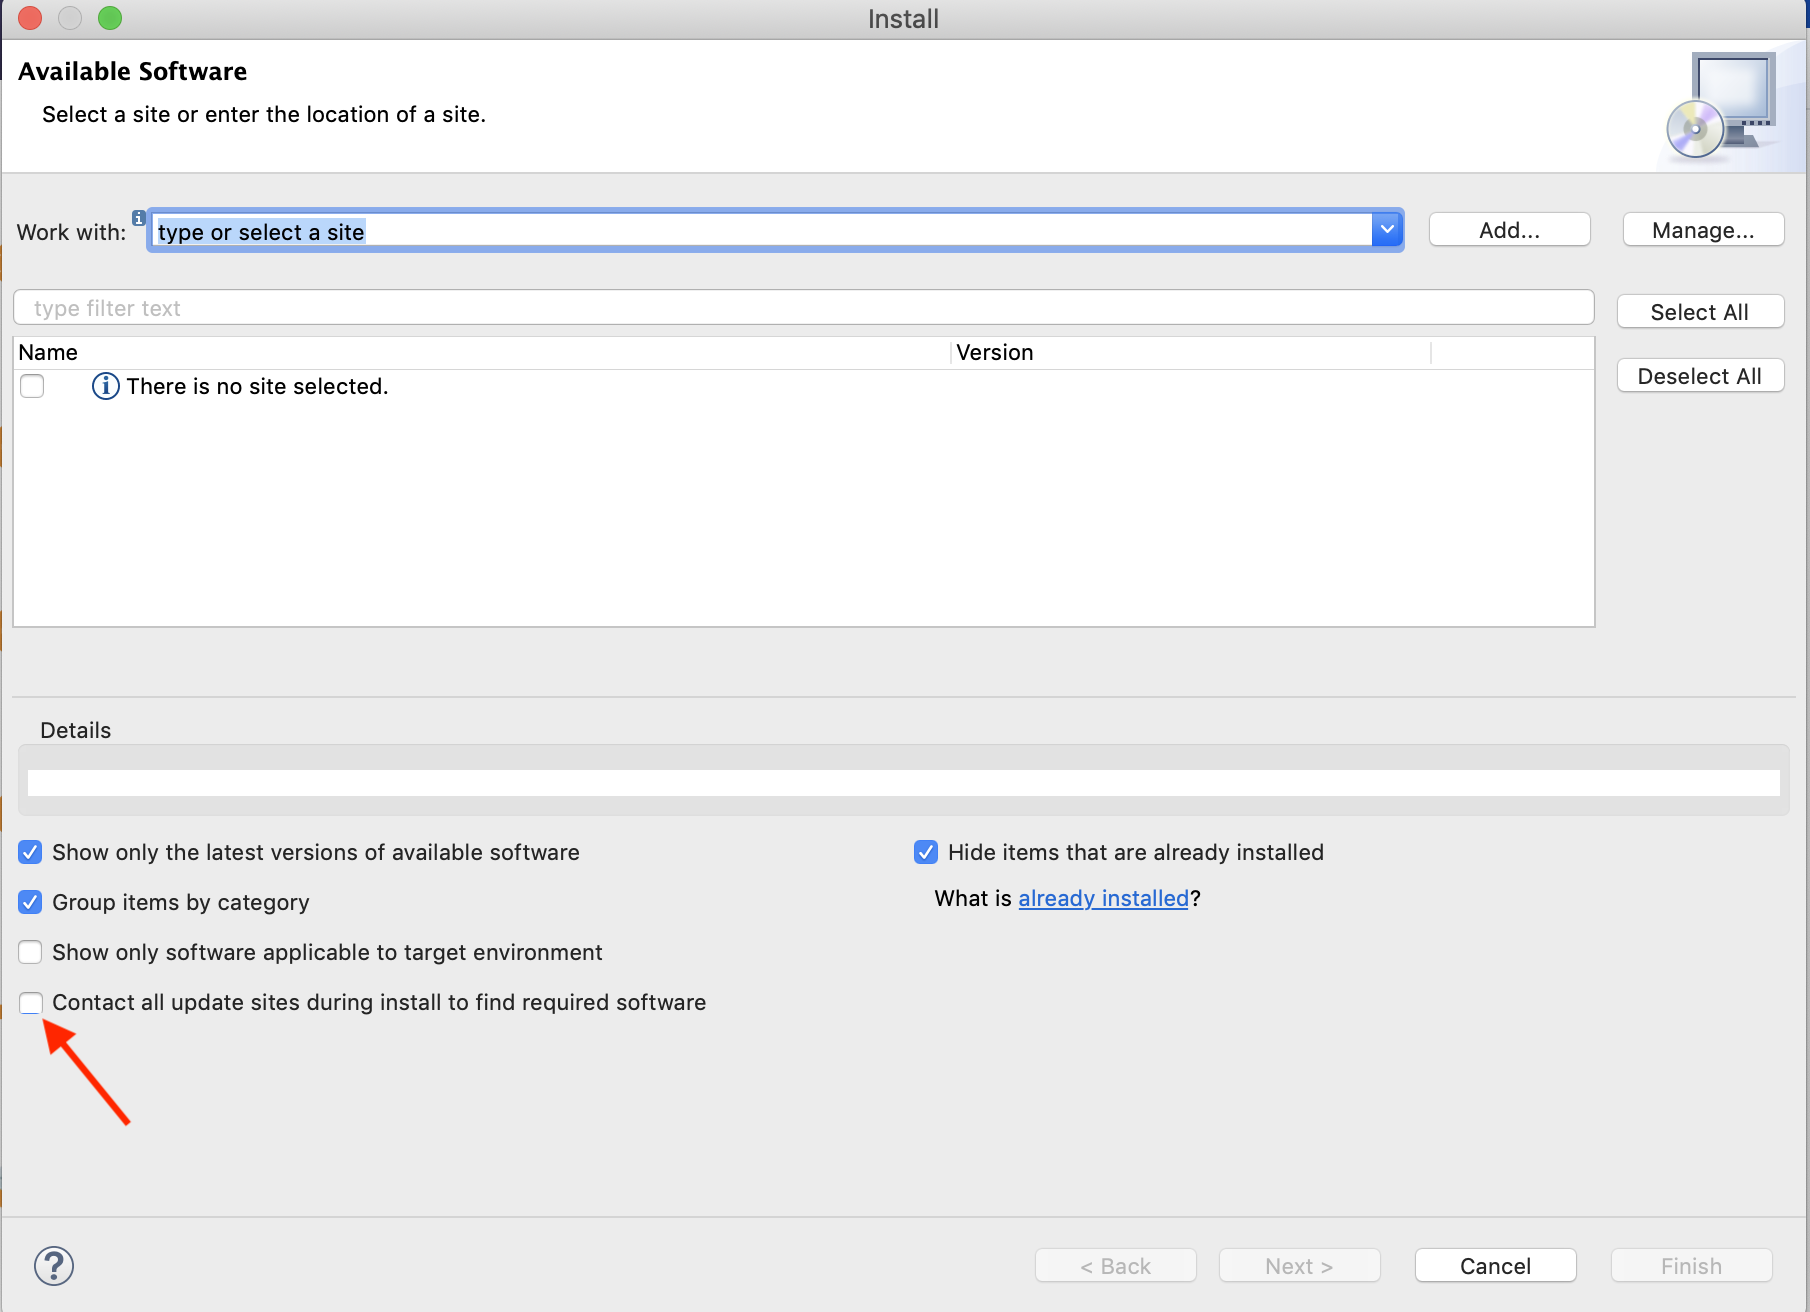
All p2 plugins are possible to install via Help → Install new software.
Unselect the checkbox 'Contact all update sites during install to find required software' for installing directly.

Select Add button to add plugin source and put in the URL field the Nexus Repository proxy repository URL.
Here we are going to use the
p2-proxyrepository.http://localhost:8081/repository/p2-proxy/
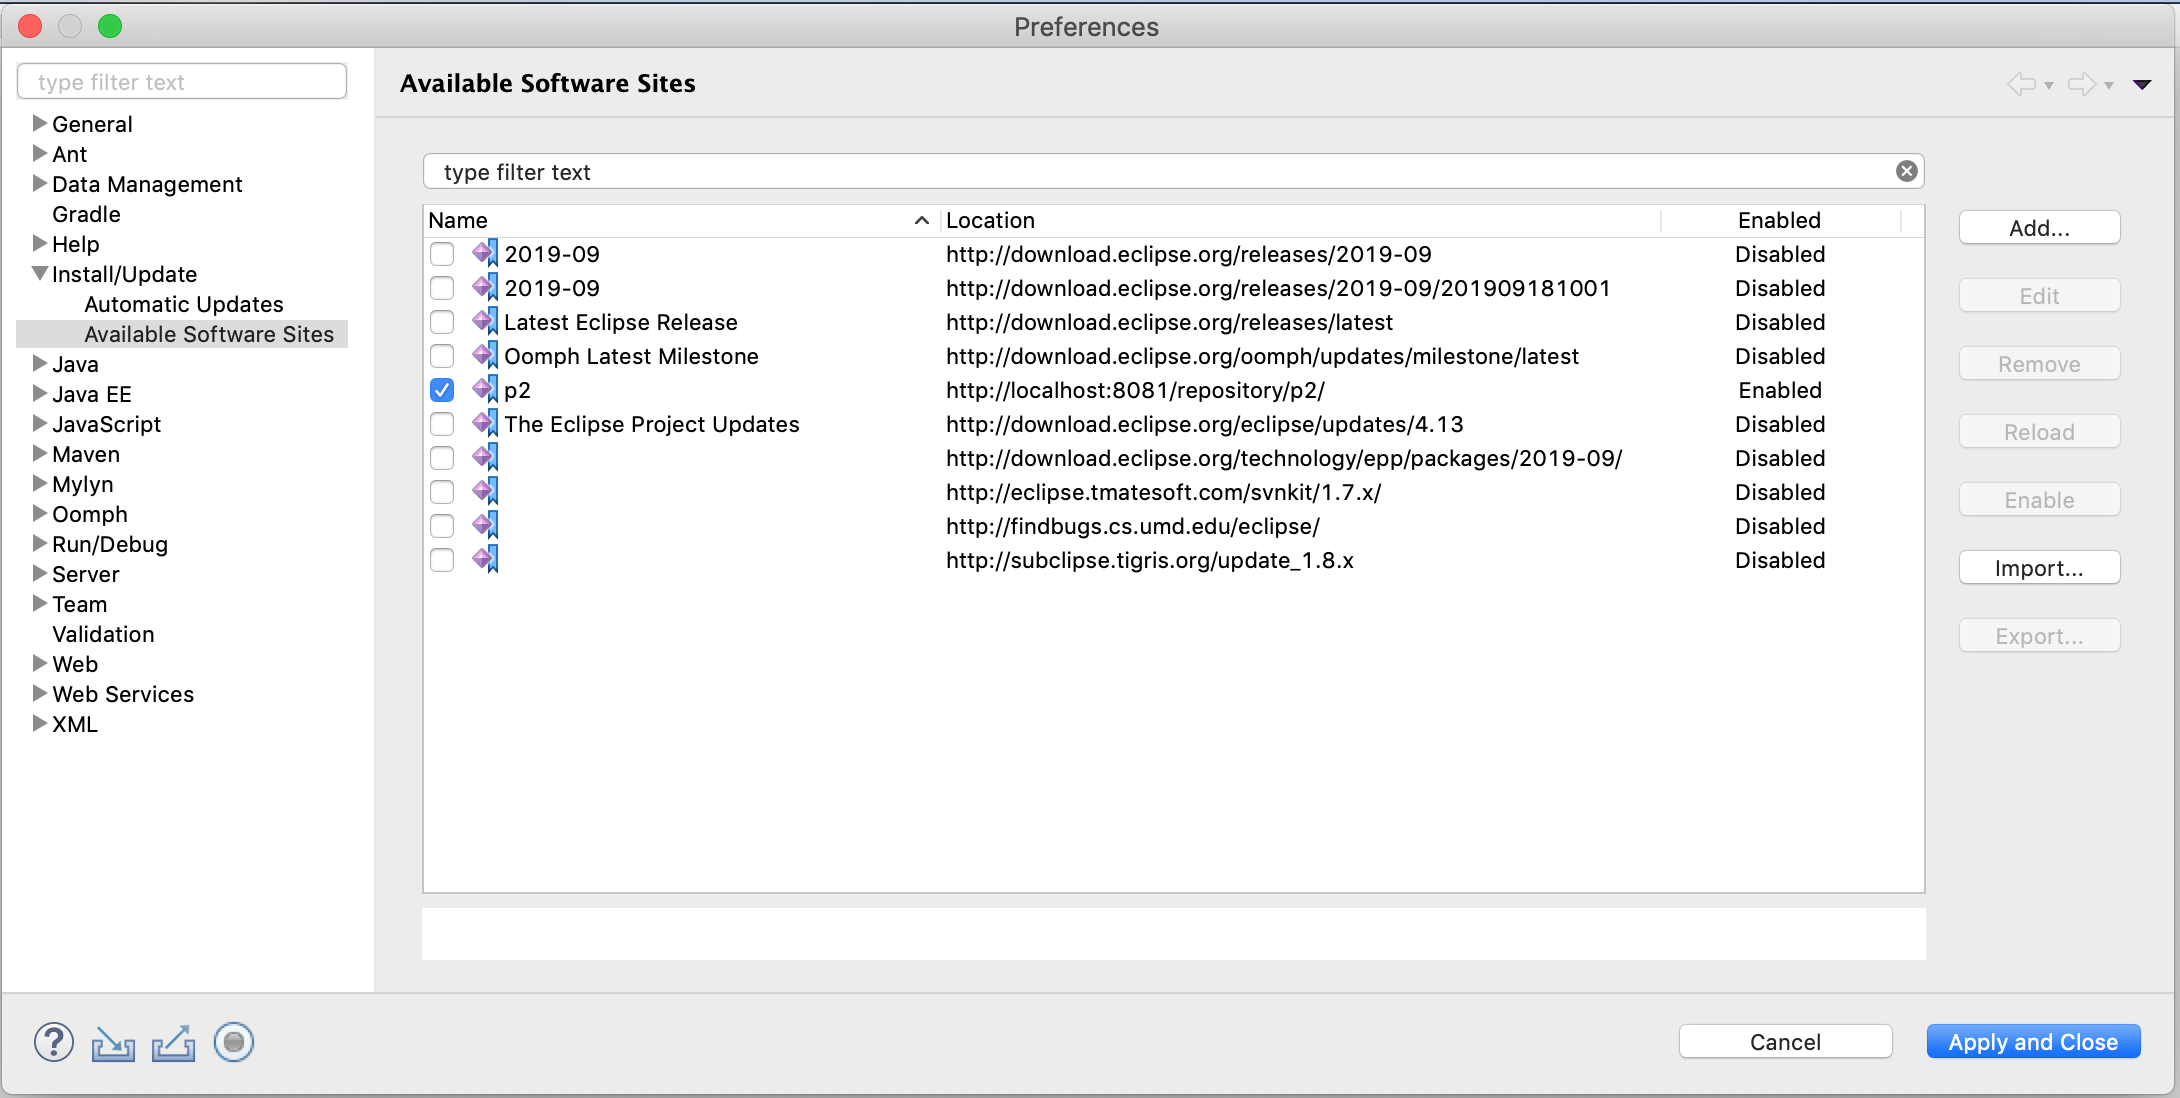
Click Manage button if you want to manage your sources. There are some Eclipse sources here by default, you can disable them if you need just NXRM sources (deleting these resources will not lead to the desired result, they will appear again after the application is restarted).

Plugins Install
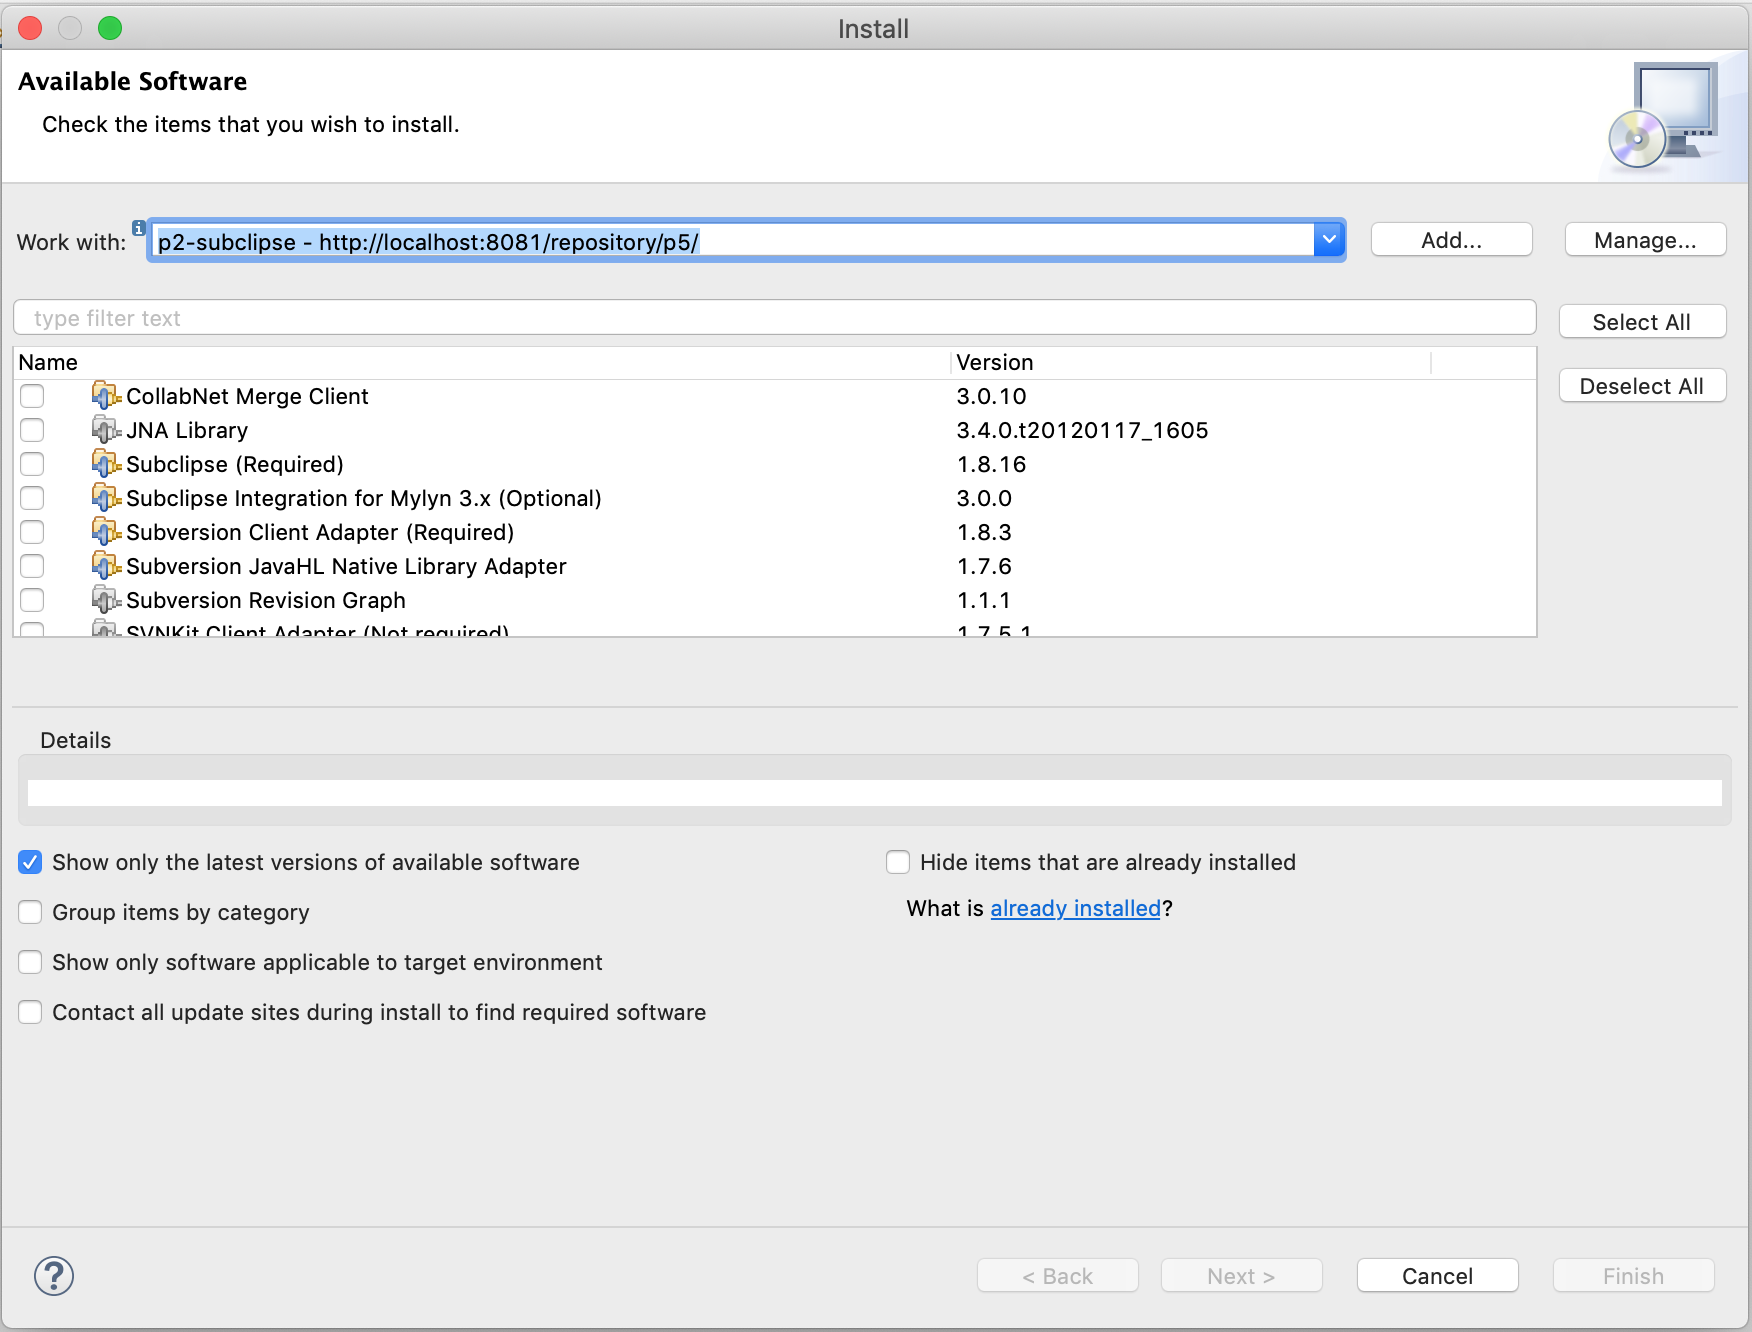
Select plugins. In this example, we are using another proxy repository where this one is named p5. Use the proxy url created above.
 |
Follow the instructions. After installation, the Nexus Repository contains proxied packages.