Support Features
Nexus Repository has features to manage and monitor your server and are useful for troubleshooting and support activities. Support features are available in the Support view of the Settings menu.
Support ZIP
Administrators may produce a support zip by navigating to Settings → Support → Support Zip. Submit the generated ZIP archive file to Sonatype support by email or attach it to a support ticket.
Sensitive password-related information is removed from the generated files. You are prompted to verify your repository manager account credentials when generating the support zip.
Single Instance Environment
In non-highly available deployments, the support ZIP archive files are stored on the server in the following directory named as the time the file was generated.
$data-dir/downloads
To generate a support zip:
Select the Support and then Support Zip sidebar menu options.
Select the contents you would like to include in your support zip; then select Create support Zip.
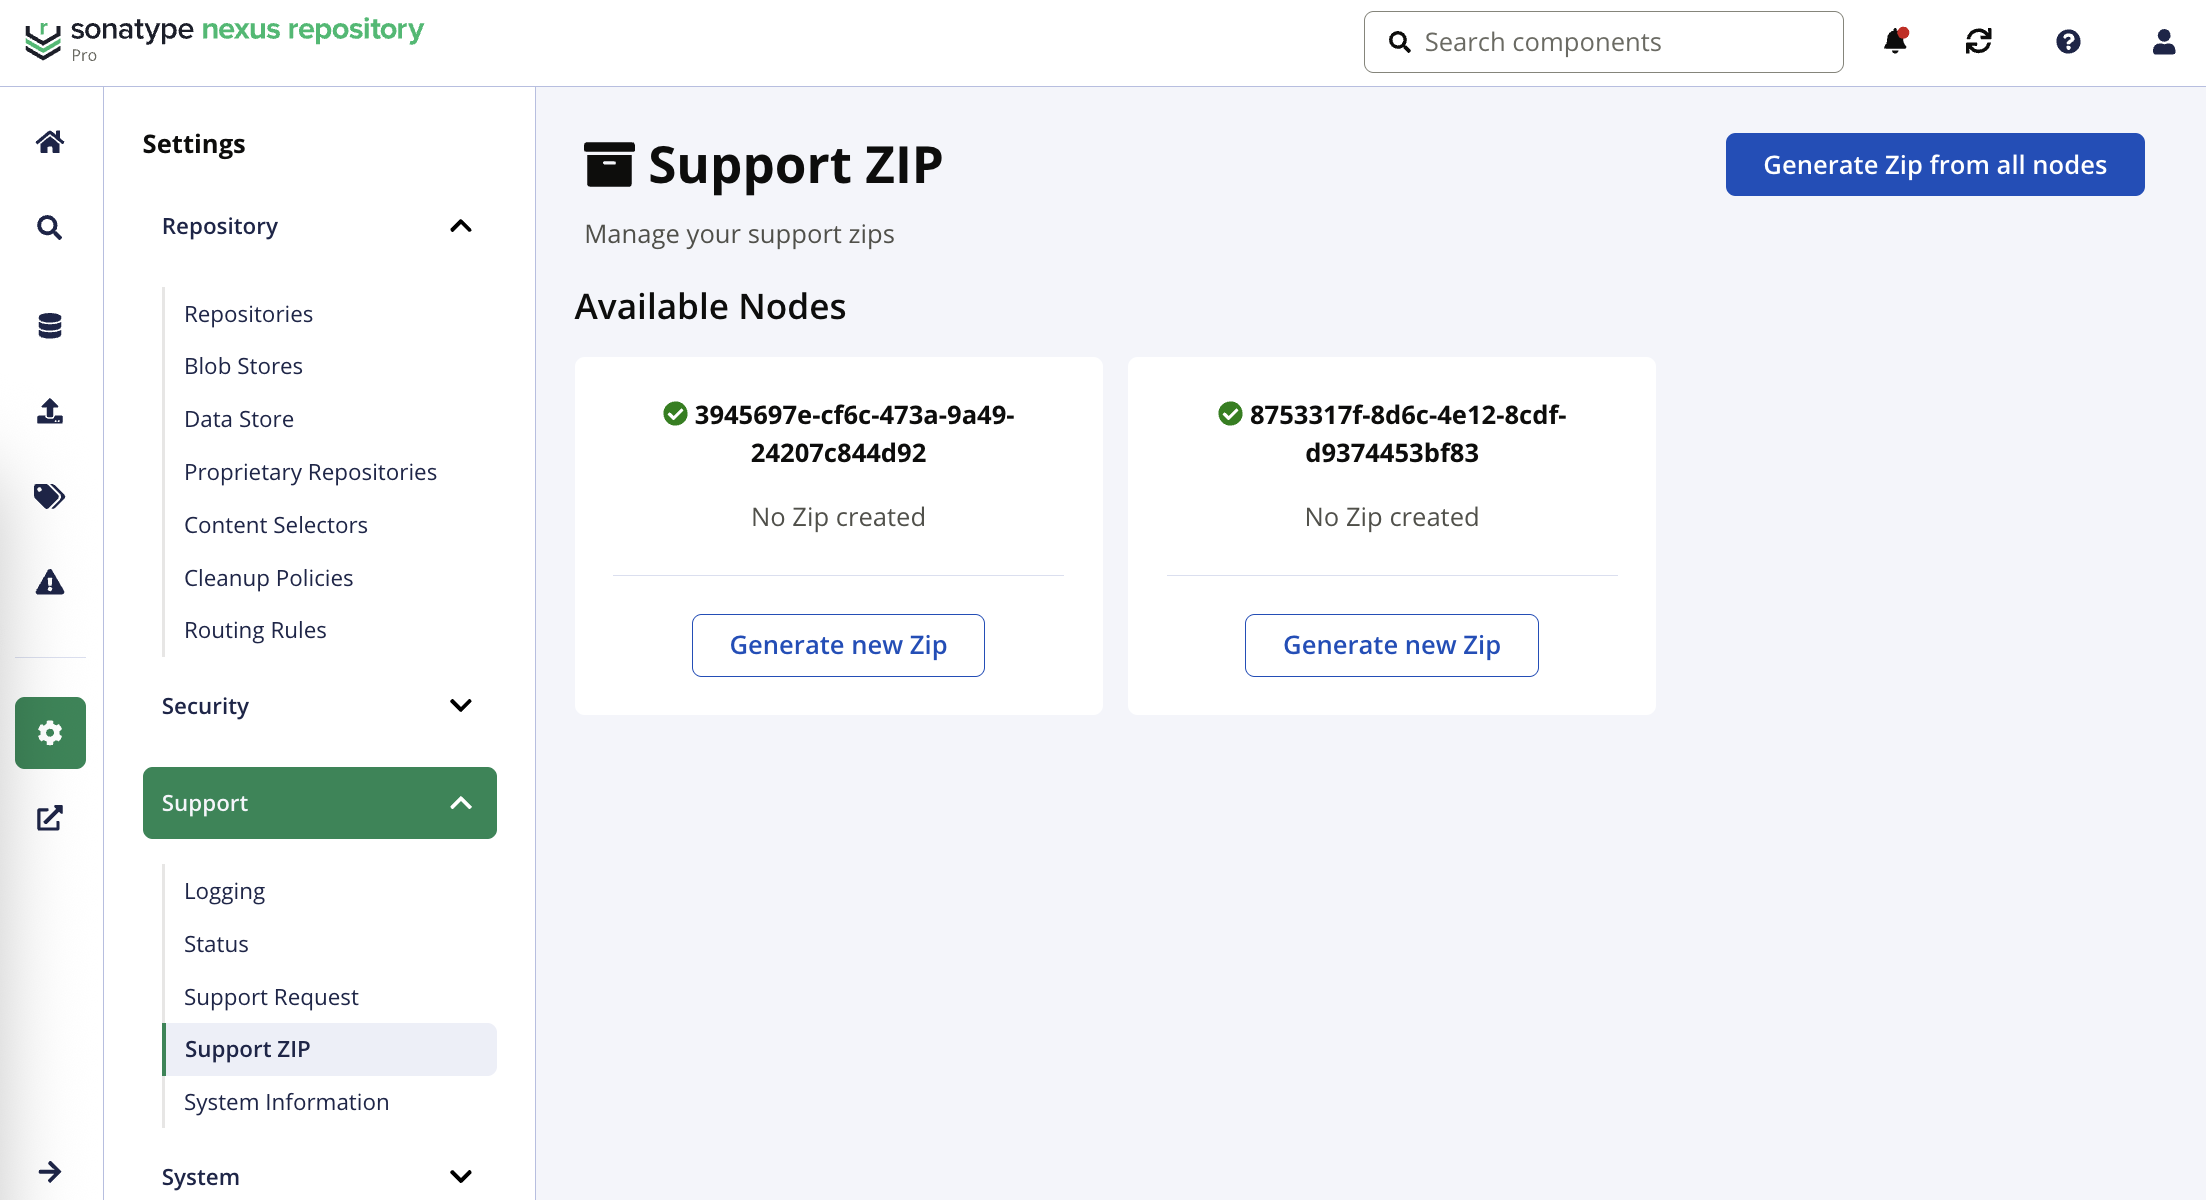
High Availability Environment
In highly available deployments, each node needs to generate a support zip to diagnose issues. High-availability nodes not shut down gracefully will continue to appear as the view is refreshes. These zips are stored in the shared blob store.
Follow these steps to generate a support zip:
Select Support and then Support ZIP sidebar menu items.
Select the Generate new Zip button for the given node; alternatively, select the Generate Zip from all nodes button.
Select the contents to include in the support zip.
Select the Create support zip button.
Allow time for the support zip to be created. A spinner appears while generation is taking place. Refresh the view to see the download link(s) in the node cards.
Select the link to download the zip file.
Locate the support zip in the shared blob store in the following path:
/shared_blob_store/content/directpath/nexus-blobstore-download-service