Continuous Monitoring
Continuous Monitoring regularly checks the most recent scan of an application for new violations. Use this feature to send alerts when new violations have been discovered on existing application scans.
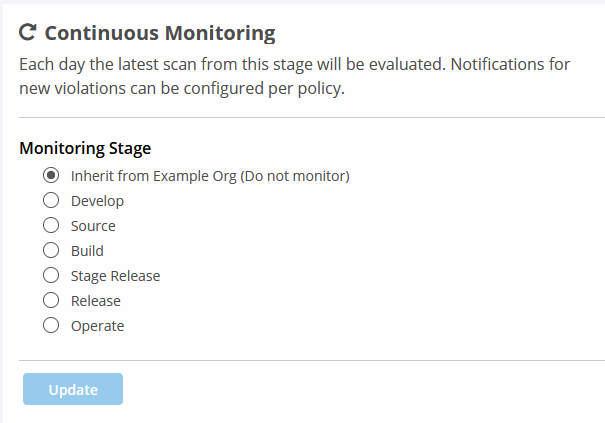
Enabling continuous monitoring requires first setting the stage that it should be run against and the notifications to send when a new policy violation occurs. Not setting a notification will still result in the violations being discovered, however they will not be known until someone consults the reports or dashboard.
Continuous Monitoring configuration uses inheritance and overrides when setting the stage it runs and notifications. The configuration may be set at any level though we recommend setting at the root organization.
Turning On Continuous Monitoring
The Edit IQ elements permission is required for the organization/application for which continuous monitoring is configured.
Select the organization or application to monitor.
Click the Continuous Monitoring button or scroll down to the Continuous Monitoring section.
You should see the option Do Not Monitor or Inherit from [Parent] (Do not monitor). Click the chevron.
Select a stage to monitor, from the list and then click Update.
 |
Setting continuous monitoring notifications
Configure notifications for continuous monitoring at the policy level to identify the recipients when a new policy violation is triggered.
On the left sidebar, click Orgs and Policies.
Select the organization or application you want to monitor.
Click on an existing policy. If the policy is grayed out, that means that policy is being inherited from the organization or root organization and can't be altered at this level. Move one step up the hierarchy and click on the policy. If it's still grayed out, move another step up the hierarchy.
Click the Notifications button or scroll to the Notifications section.
Select the recipient type. You can mix and match multiple recipients across all three types.
If the recipient type is Emails, specify the exact email address.
If the recipient type is Role, select the role. All users assigned this role will receive a notification email.
If the recipient type is Webhook, select an existing Webhook from the list. See Lifecycle Webhooks to learn more.
For each notification recipient, check the Continuous Monitoring box.
Scheduling Continuous Monitoring
Continuous Monitoring starts at midnight, local to the hosting system. You can change this start time using the Configuration REST API.
Manually triggering the continuous monitoring task
The continuous monitoring task may be manually triggered using the Operational Menu. In general, this is not recommended nor needed as the task will run automatically during other maintenance tasks.
Instructions are included in the Operational Menu documentation