User Tokens
This page describes how to use user tokens to authenticate users in Sonatype Nexus Repository. Users with administrator access can create, list, get metadata and delete user tokens by using the API. For more information, see the User Tokens API.
Only available in licensed Nexus RepositoryTM entitlements. Interested in a free trial? Start here.
The user token feature establishes a two-part token for a user that the user can then use instead of providing a plain text username and password for authentication. User tokens provided added security beyond what reversible encryption provides and are especially useful when using single sign-on solutions like LDAP for authentication.
For example, when using Apache Maven with Nexus Repository, user credentials for accessing the repository manager must be stored in the user’s settings.xml file. While the Maven framework can encrypt passwords within the settings.xml, it must be reversible to be used, which results in limited security. Other build systems use similar approaches and can also benefit from using user tokens.
Note that, by default, the settings.xml file is available under ~/.m2/settings.xml. This file contains listings for personalized clients or build-tool configurations, such as repositories. This file is not exclusive to Maven-specific repositories.
Enable User Tokens in Nexus Repository
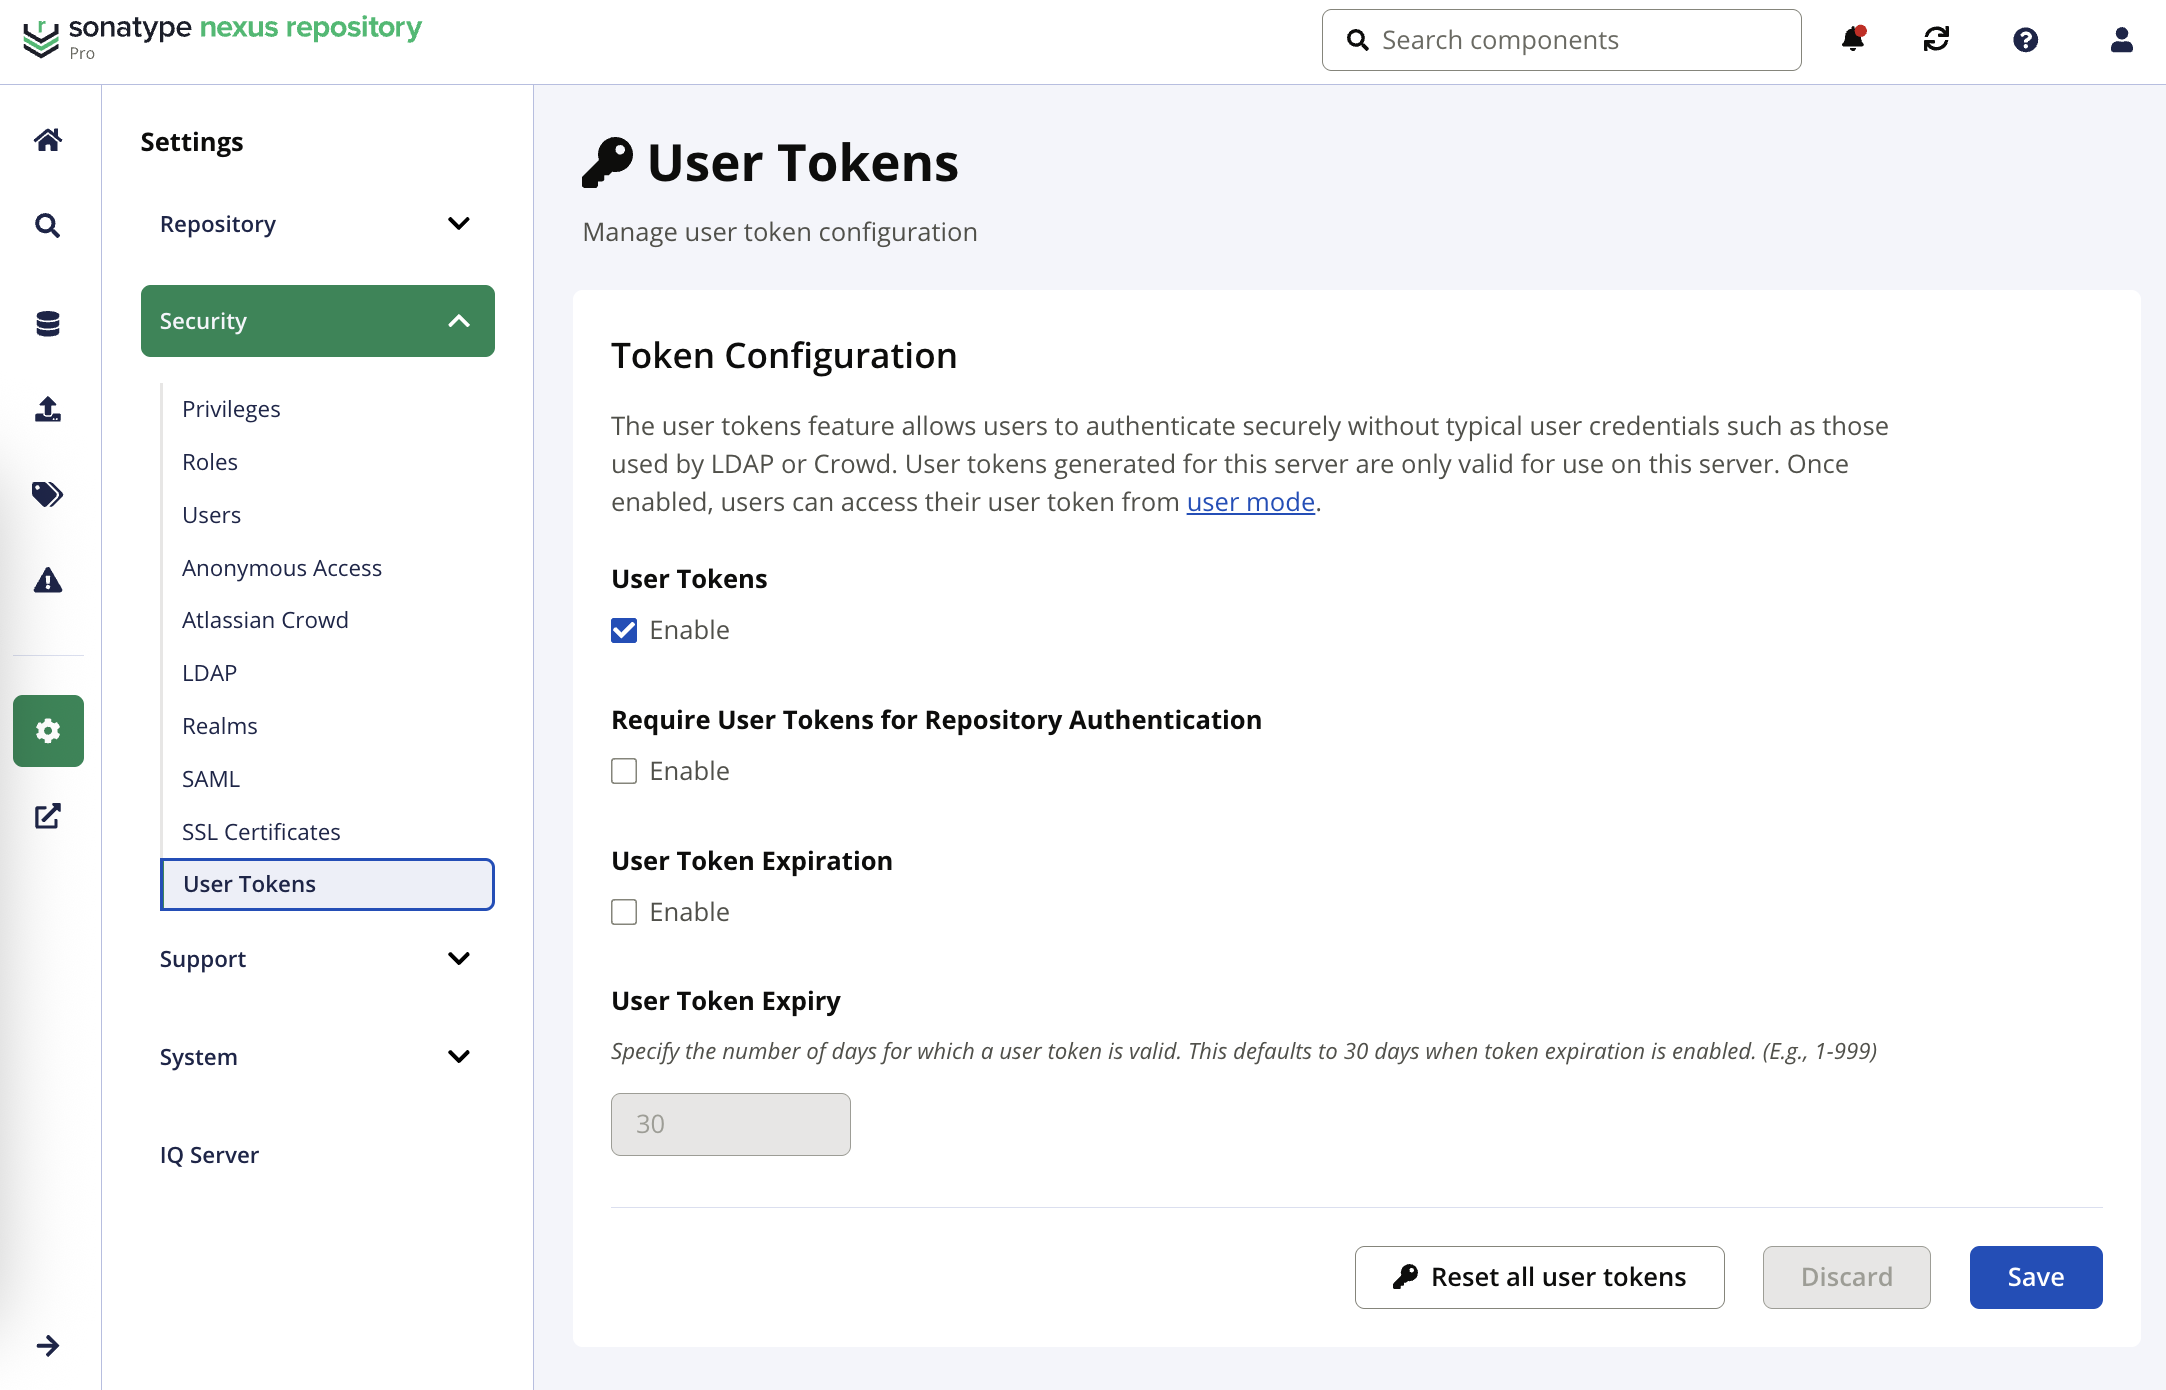
Administrators require the nx-usertoken-settings privilege to activate user token-based authentication under Settings → User Token view.
Considerations for Enabling User Token Expiration in an Existing Deployment
If enabling User Token Expiration on an existing deployment, the configured expiration settings will apply to existing user tokens as well as newly created ones. The start date for Nexus Repository to calculate whether a given token should be considered expired is based on token creation date. (E.g., if Token X was created 365 days ago and your setting expires tokens after 100 days, then Token X will be considered expired upon enabling the User Token Expiration feature.)
Select the Enable box under the User Tokens section to enable user token-based authentication
If desired, select the Enable box under Require User Tokens for Repository Authentication to have Nexus Repository require a user token for any access to repositories and group content URLs.
Requiring user tokens for repository authentication affects both read and write access related to build execution or manual upload; however, the user interface does not change.
Non-content operations (e.g., logging into Docker with plain-text credentials) are still accessible even when the Require user tokens for repository authentication box is checked; however, subsequent requests for images after logging in will fail.
Note
Require user tokens for repository authentication does not work with Docker repositories if the Allow anonymous Docker pull configuration is enabled.
If desired, select the Enable box under User Token Expiration; then, under User Token Expiry, enter the number of days for which you want user tokens to remain valid. This defaults to 30 days, but you can set this field to anything between 1-999 days. (New in 3.69.0)
Select Save.
User Token Realm
When you enable user token-based authentication, Sonatype Nexus Repository automatically adds and activates the User Token Realm.
By default, the User Token Realm will appear at the top of your list of active realms; this means that user tokens will be given first priority for granting user access in the event of a name clash between authentication realms.
If you disable user token-based authentication, Nexus Repository will not remove or deactivate the User Token Realm; however, it will cleanly pass over this realm to the next one in the active realms list.
For full information about authentication realms, see Realms.
Generate a User Token
Sonatype Nexus Repository generates user tokens the first time that a user accesses the token. Users need the nx-usertoken-current privilege to access their user tokens. For details on granting privileges, see our Privileges help topic.
To access the User Tokens menu, follow these steps:
Nexus One UI
Select Account Settings, Tokens and Keys on the top-right corner of the screen.
.
Select User Token.
Select Generate Token to create the user token.
Classic UI
Select your username on the top right area of the main toolbar to manage your account.
In the left-hand navigation panel, select the User Token tab.
Select the Access User Token button.
In the resulting dialog, re-enter your credentials and select Authenticate.
Another dialog will appear containing your user token information; note that the dialog closes automatically after one minute.
Your user token dialog contains the following information:
User token name code and pass code: Your user token name and pass codes display in separate fields. You can use these as replacements for username and password in the login dialog. You can continue using your username and password to log into the user interface.
Server section for Maven settings.xml: The user token dialog also provides the server configuration for your Maven
settings.xmlfile. Replace ${server} with the repository ID configured in Maven for the Nexus Repository instance you want to authenticate with using your user token.base64 representation: A Base64-encoded value of the user token name code and passcode in the format
nameCode:passCodeNote
The npm client accepts only lowercase letters (a-z) and numbers (0-9) in usernames, while Nexus Repository user token names can contain additional Base64 characters. This may cause authentication errors when you use a user token with npm.
To avoid this issue, add the Base64-encoded value of the user token name code and passcode (
nameCode:passCode) directly to your.npmrcfile.
Use a User Token for Authentication
Sonatype recommends using a user token instead of your account credentials to authenticate when accessing Nexus Repository from supported clients and build tools. For HTTP Basic authentication, use the user token name code as the username and the passcode as the password.
curl -v --user {username}:{password} http://localhost:2468/repository/bower-all/To use your user token, replace username and password with your user token name and passcode separated by a colon in the curl command line:
curl -v --user {token name code}:{token pass code} http://localhost:2468/repository/bower-all/Reset User Tokens
Nexus Repository allows administrators and users to reset user tokens. Starting with version 3.99.0, this operation also revokes format-specific tokens. Revoked user tokens and format-specific tokens become invalid. User tokens must be manually generated while the replacement tokens are generated for format-specific tokens when the user or client requests them. Resetting a user token does not affect the user's password or service-account tokens.
You can use this method to revoke tokens for the following repository formats:
Conan
Docker
Huggingface
npm
NuGet
OCI
Terraform
Note that formats that use Base64 encoded credentials such as Ansible Galaxy and Pub do not store tokens in Nexus Repository and are not affected by this operation. To revoke access for those formats, change the user's password.
Warning
Resetting tokens can interrupt command-line builds, CI pipelines, and other automated processes that use revoked credentials. Update the affected credentials in your build tools and client configurations, such as Maven's settings.xml and obtain replacement format tokens where required.
Reset All User Tokens
Administrators or users with the nx-usertoken-users privilege can reset all user tokens. This operation invalidates user tokens for all users and also revokes format-specific tokens. Take the following steps to reset all user tokens:
Navigate to Settings → User Token
Select the Reset all user tokens button.
In the confirmation dialog, enter Reset all user tokens.
Select Reset User Tokens.
Reset Another User's Tokens
Administrators or users with the nx-usertoken-user privilege can reset another user's tokens along with format-specific tokens. To reset another user's token, navigate to Settings → Users and complete the following steps:
Select the user whose tokens you want to reset.
Select the User Token tab.
Select Reset user token.
In the Authenticate dialog, enter your password.
Select Authenticate to complete the reset.
Reset Your Own Tokens
You can reset your own user token along with format-specific token when you need to revoke an existing token. To reset your user token, complete the following steps:
Select your username on top right area of the main toolbar.
In the left-hand navigation panel, select the User Token tab.
Select the Reset user token button.
In the resulting dialog, re-enter your credentials and select Authenticate.
Clean Up Tokens of Deleted Users
When you delete users, some user tokens and format-specific tokens may remain as orphaned keys. To remove these records, create a Admin - Delete orphaned API keys task. You can run the task manually or configure it to run periodically. For more details on configuring a task, see Tasks.
After resetting the tokens, generate a replacement. If format-specific tokens were also revoked, affected package clients must re-authenticate before they can use Nexus Repository. Docker and OCI clients with stored credentials receive a new token automatically on the next request. For other formats, users must sign in again using their client tool.
User Token Expiration
If an administrator has configured user token expiration as explained in Enabling User Tokens, you can view the time remaining until your user token expires:
Select your username on the top right area of the main toolbar to manage your account.
In the left-hand navigation panel, select the User Token tab.
Locate the User Token Status section, which provides the date and time when your user token is set to expire.
If your token has already expired, you will see that the status is set to "Expired," and a warning box will appear letting you know that you must select the Generate User Token button to generate a new user token.