Automated Waivers
Automated Waivers allow you to automatically manage waivers for low-risk security policy violations that have no upgrade path (i.e., no safe component version available) and/or if the violating component is not reachable. Once configured, automated waivers will be applied and removed dynamically, based on the upgrade path and reachability, at the time of application evaluations.
Violations that are auto-waived will not trigger policy actions, saving time and effort otherwise spent requesting and creating waivers. The auto-waived policy violations will be excluded from subsequent application evaluations, allowing the development teams to focus on the policy violations that are more actionable.
Automated waivers are not permanent; they are automatically removed if there is a change in the condition that justified the waiver. For example, if an auto-waiver was applied to a policy violation for a vulnerability that was not reachable, now becomes reachable, the auto-waiver will be removed because it no longer satisfies the Vulnerability is Not Reachable condition. Similarly, if a safe version of the component is now available, the auto-waiver will be removed from the policy violation because it no longer satisfies the Upgrade Path is Not Available condition.
Automated waivers are context-aware, leveraging Reachability Analysis to make intelligent, application-specific decisions. Rather than applying waivers based on conditions that are relevant to context of the root or parent parent organization, the system evaluates each violation in the context of the specific application’s usage and risk exposure, and applies automated waivers if relevant to the application context.
Configure Automated Waivers for Policy Violations
You can configure Automated Waivers at the application, organization, or root organization level.
Configuration options include the following:
Maximum threat level: This represents the highest level of your acceptable risk threshold. Any violation with a threat level above this value will not be auto-waived AND
The reason for applying automated waivers. This includes:
Upgrade path is not available
Selecting this option will create an auto-waiver for a policy violation which is not actionable. It implies that a newer and non-violating version of the component implicated by the violation is not available, preventing an upgrade.
Vulnerability is not Reachable
Selecting this option will create an auto-waiver for a policy violation associated with a component that is not invoked during the application runtime as determined by Reachability Analysis, thus posing minimal risk. Learn more about Reachability Analysis.
IMPORTANT: Reachability Analysis must be enabled via Sonatype CLI (version 2.4.2-01 or higher) or your CI/CD integration plugins for this option. Check the latest release notes for your CI/CD plugin version that supports this feature.
An application or organization can have up to three automated waivers, including inherited ones, one for each condition:
Upgrade path is not available.
Vulnerability is not reachable.
A combination of the conditions 1 and 2 above.
Example: An automated waiver has been configured for application A, with reason selected as "Not Reachable" and a maximum threat level of 8. You cannot create another automated waiver for application A, with the same reason "Not Reachable", because the two threat levels contradict. Instead, edit the existing auto-waiver and adjust the threat level.
To configure Automated Waivers for an application or organization:
Navigate to Orgs and Policies in the left navigation bar and click on the Auto-Waivers option on the top right scroll bar.
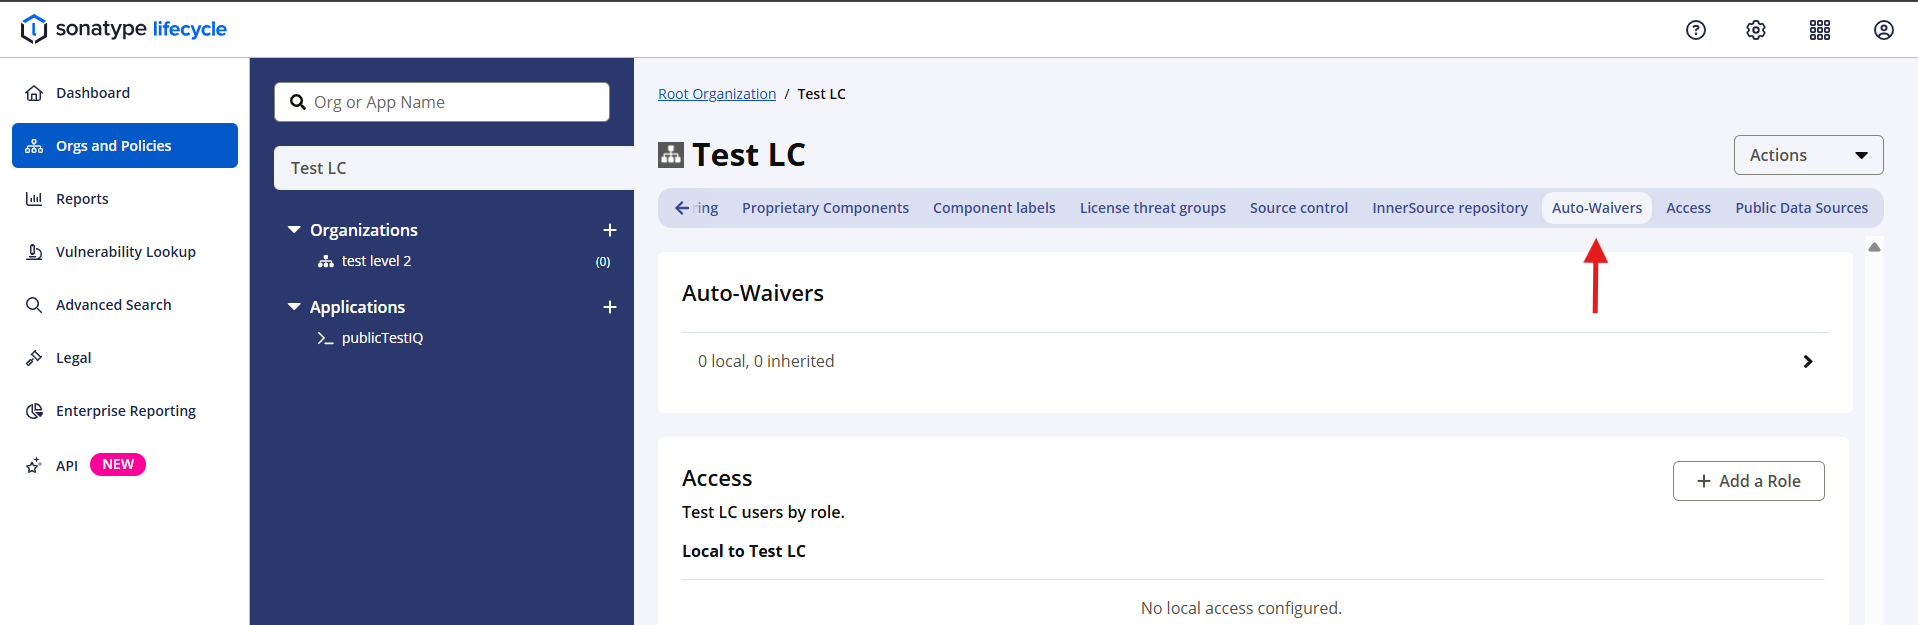
The Auto-Waivers row shows a preview of the number of inherited (from root or parent organization) and non-inherited automated waivers.
Click on the Auto-Waivers row to view the Automated Waivers page.
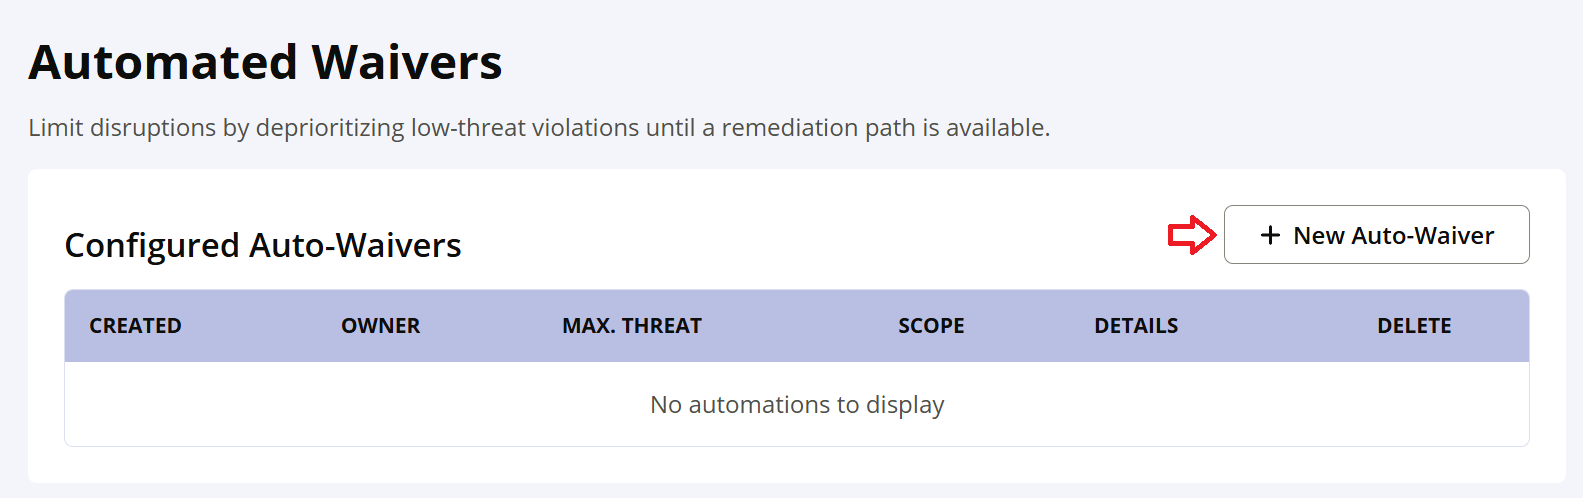
Click on the New Auto-Waiver button to create a new automated waiver for the selected organization or application.
Select the Threat Level and other reasons for which you want to configure Automated Waivers.
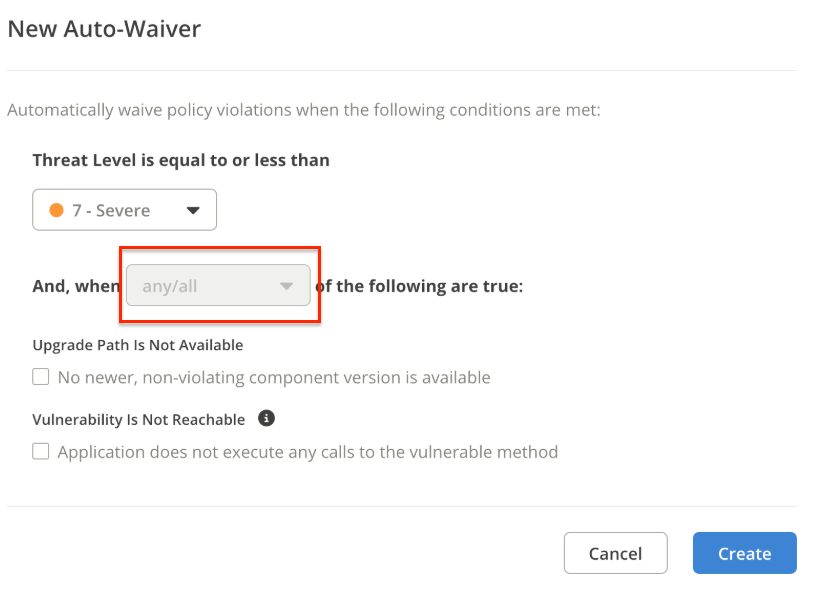
Use the check box to select the reasons for creating the automated waiver. The any/all drop down is enabled only if both options are selected.
Select any to auto-waive a policy violation that satisfies either of the two conditions.
Select all to auto-waive a policy violation that satisfies both of the two conditions.
Click the Create button to complete the configuration of the automated waiver.
Next Steps After Configuring an Automated Waiver
Re-evaluate the application, to auto-waive the existing policy violation. This will apply automated waivers for violations which do not have an upgrade path available.
Re-scan the next available CI build of your application or manually scan the application using Sonatype CLI. This will apply automated waivers for policy violations that are not Reachable.
View Existing Automated Waivers
To review the existing automated waivers for your organization or application,
Navigate to the organization or application in the secondary left navigation bar.
Locate the Auto-Waivers option on the top right scroll bar and click to view the existing automated waivers.
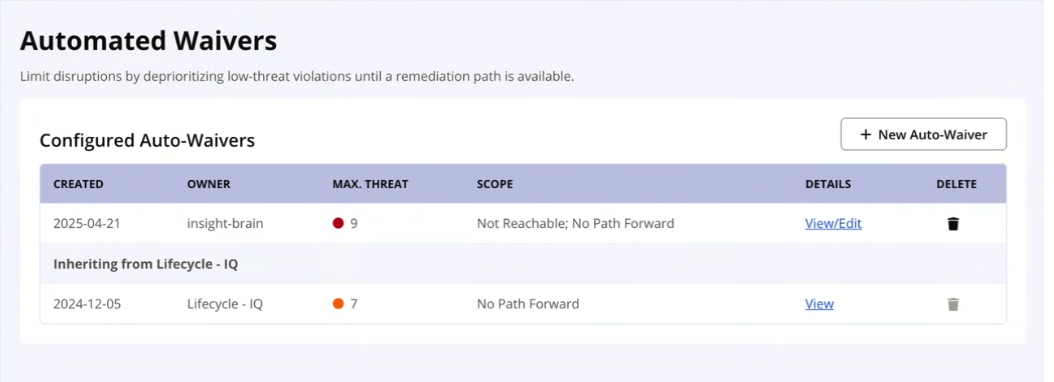
The Details column shows View/Edit option for the existing automated waivers.
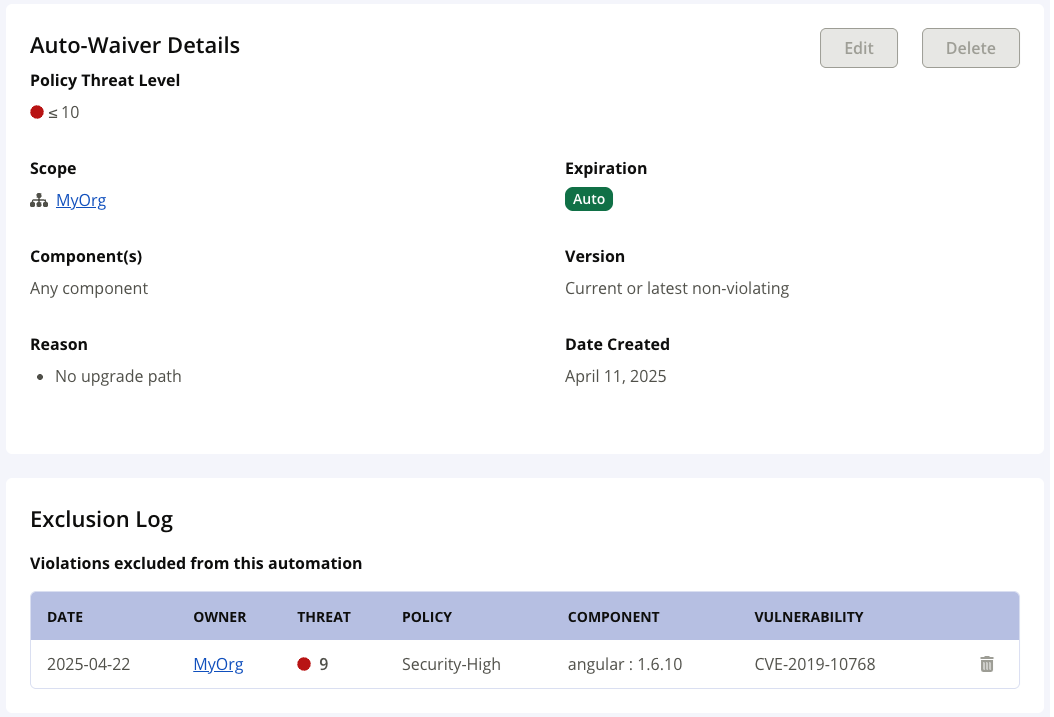
Click on the View/Edit link for details on the selected automated waiver. The Auto-Waiver Details page contains the configuration details (scope, reason, component), date created and the Exclusion Log (list of exclusions that were applied to this automated waiver.)
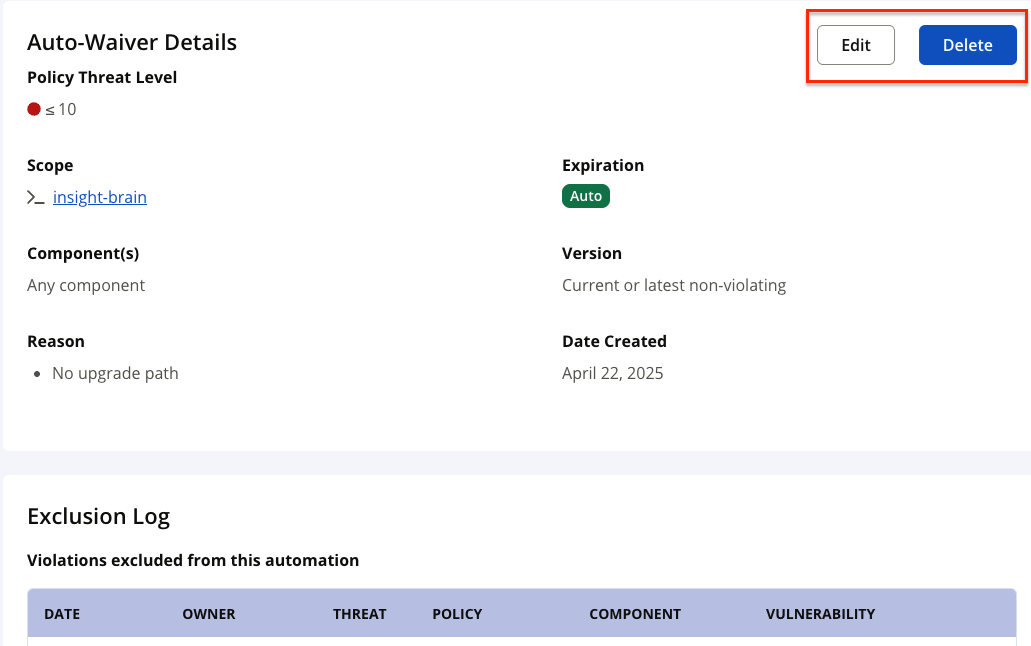
Click on the Edit button to make any changes to the existing automated waiver. Click on the Delete button if this automated waiver is no longer required. For inherited automated waivers, these buttons will be disabled.
You can change both, the threat level of the policy violation and the combination of reasons for the automated waiver.
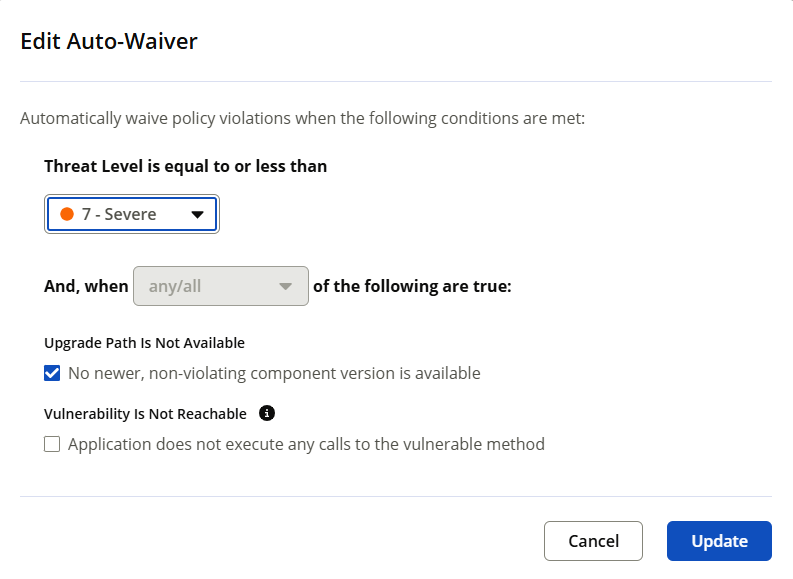
Click Update to apply the changes to the automated waiver.
The Edit and Delete Options
Inherited automated waivers cannot be edited or deleted. To edit/delete inherited automated waivers, navigate to the parent organization for which the automated waiver was configured and delete for the parent organization.
The Exclusion Log contains a list of all policy violations to which automated waivers were applied, but were excluded or removed manually. Learn more about Exclusion of Automated Waivers.
Working with Automated Waivers
Applications must be re-evaluated or re-scanned to ensure that automated waivers have been applied to existing policy violations.
The application must be re-evaluated to apply the auto-waiver for the Upgrade Path is Not Available condition.
The application must be re-scanned to apply the auto-waiver for the Vulnerability is not Reachable condition.
The application report generated, will show the policy violations that are Auto-Waived.
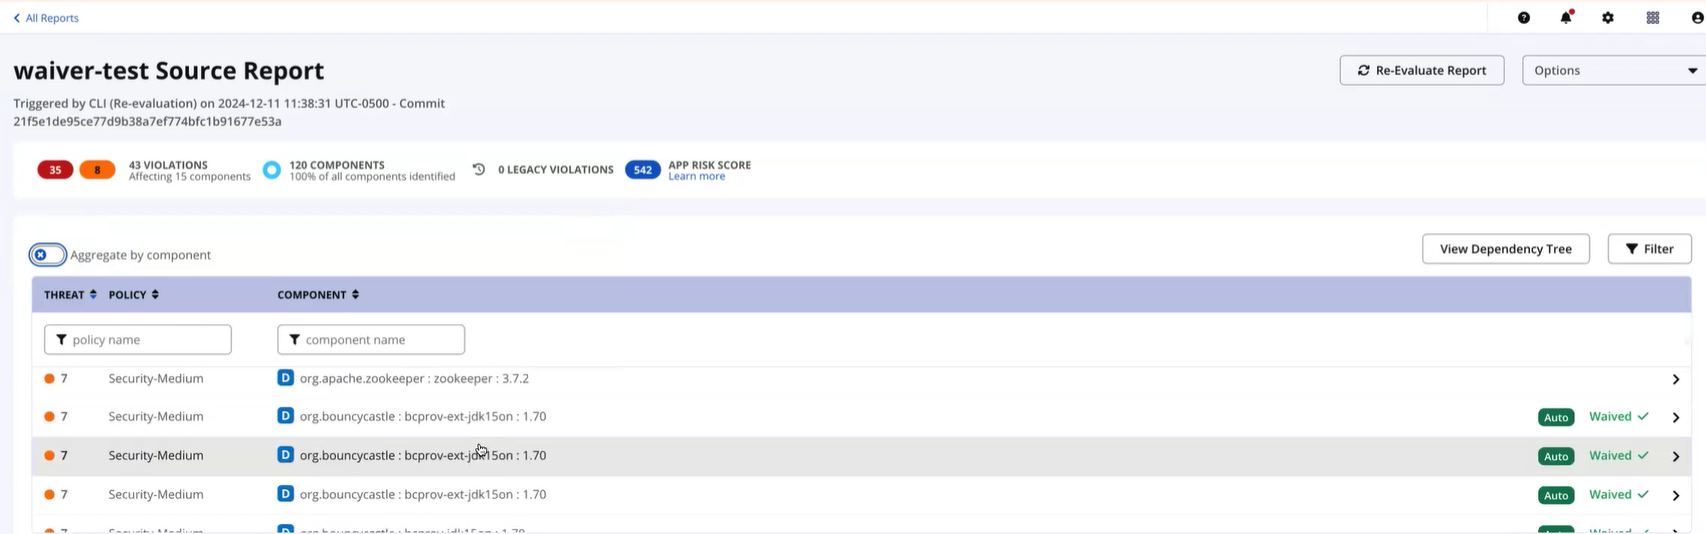
1. Click on the policy violation labeled with the Auto tag to open the component details page.
2. Click on the Policy Violations tab on the top of the component details page. The Auto tag identifies the violation with an automated waiver.
3. Select the policy violation with the Auto tag to view the Security Violation details.
4. Navigate to the Applicable Waivers tab to confirm the waiver is an Automated Waiver, marked by the Auto tag under the Expiration section.
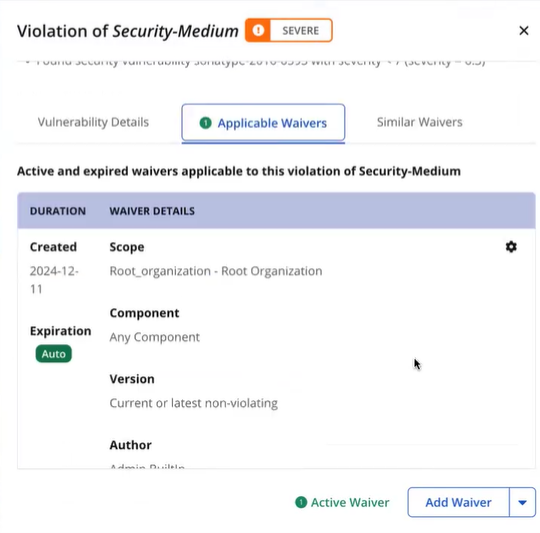
Automated Waivers do not expire.
If the conditions for applying the automated waivers are no longer satisfied, the policy violation will no longer be auto-waived, after subsequent evaluations.
Exclusion of Automated Waivers
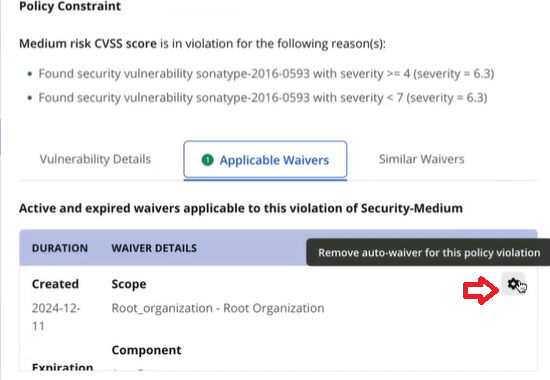
If you no longer want a policy violation for an application to be automatically waived, you can exclude or remove the Automated Waiver by clicking on the Remove auto-waiver for this policy violation setting.
When an Automated Waiver is removed from a policy violation, it will be added to the Exclusion Log, and will not be automatically waived in subsequent evaluations. To re-enable the automated waiver in the Exclusion Log, follow the process to create the automated waiver, or delete from the exclusion log.
To view all excluded/removed Automated Waivers at the policy violation level, navigate to the Exclusion Log on the Auto-Waivers Details page of Lifecycle.
Delete Exclusion
The Exclusion Log on the Auto-Waivers Details page, contains a list of all policy violations to which automated waivers were applied, but were excluded or removed manually.
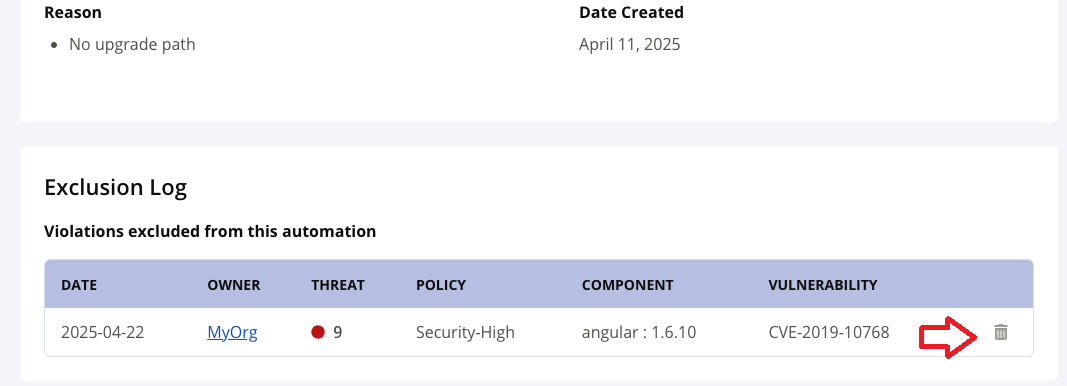
To re-enable Automated Waivers on the policy violation, navigate to the Exclusion Log. Click on the delete icon in the row corresponding to the policy violation in the list.
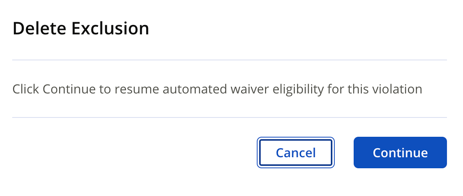
Click Continue to re-enable the Automated Waiver for the selected policy violation. An Automated Waiver will be applied after the next re-evaluation.
Policy Re-evaluation Options
The application must be re-evaluated to apply automated waivers that satisfy the Upgrade Path is Not Available condition, to existing policy violations. The application must be re-scanned to apply automated waivers that satisfy the Vulnerability is not Reachable, to existing policy violations. Refer to Re-evluating vs Re-scanning for details.
We recommend using the most recent evaluation report. Re-evaluating application reports allows you to keep your applications updated with the most recent component upgrade recommendations.
A full Re-evaluate will:
apply automated waivers for the Upgrade path is Not Available condition, to security policy violations (as configured).
remove automated waivers if a safe component is available for the remediation of the policy violation.
Re-evaluating applications that have automated waivers can cause longer evaluation times. You can skip the re-evaluation of automated waivers by clicking on the Quick Re-evaluate button.
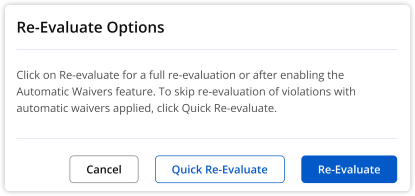
A Quick Re-evaluate will skip the re-evaluation of automated waivers and :
Not apply automated waivers to newer policy violations .
Not remove existing automated waivers from policy violations, even if a safe component is available for upgrade.
A full Re-Scan will:
Detect the latest reachability status of components
Apply automated waivers that satisfy the Vulnerability is not Reachable condition, to security policy violations (as configured).
Will Automated Waivers Reduce Scan Times?
Enabling Automated Waivers may not necessarily decrease the scan time for subsequent scans as they will still be evaluated for each scan to check for new violations. We recommend using Quick Re-Evaluate for faster results.
Enabling Automated Waivers Feature
The introductory release of this feature (Release 186) requires users to enable it. Refer to Feature Configuration REST API for details on enabling the Automated Waivers feature for your instance of Lifecycle. This feature is enabled by default for release 187 and later.