Firewall Audit and Quarantine Capability
The Repository Firewall configuration may be managed by setting the Firewall: Audit and Quarantine capability for each proxy repository that will need to be protected.
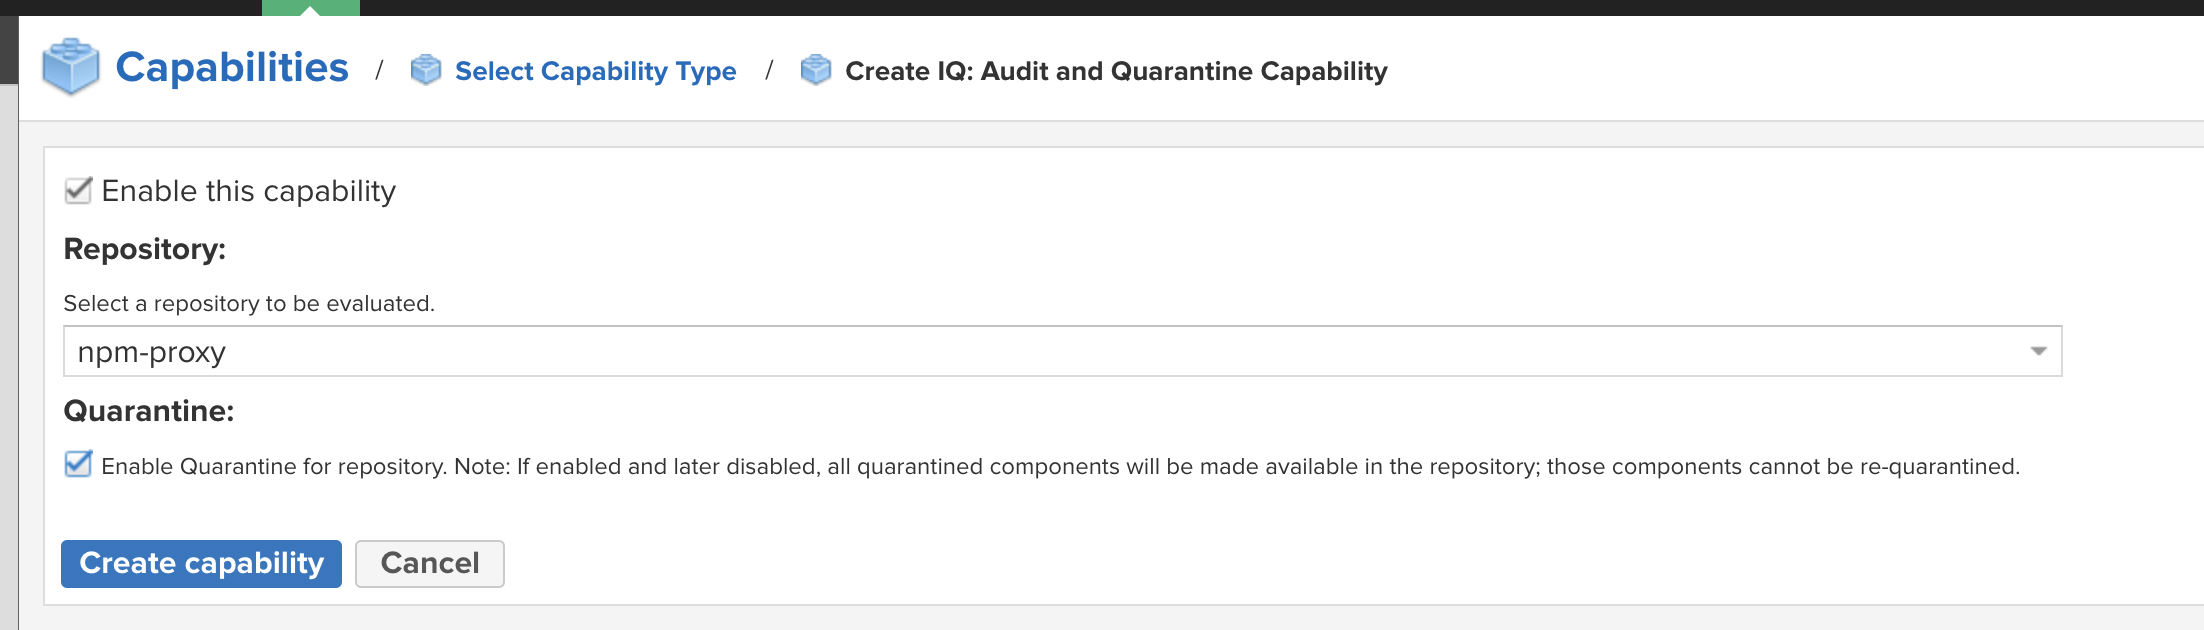
Adding the Audit and Quarantine Capability
Log in to Nexus Repository Pro 3 with Administrator credentials
Select
Settingsfrom the menuSelect
CapabilitiesunderSystemon the side menuSelect
Create CapabilitySelect
Firewall: Audit and QuarantineFrom the dropdown, select the repository to configure with the Repository Firewall
Select the
Enable Quarantine for RepositorycheckboxSelect
Create Capability
 |
The audit on the selected repository will automatically start. Nexus Repository connects to the IQ Server and evaluates the components within the selected repository against any associated policy.
The Quarantine option is required to protect your repository from critical threats. By default, only malicious components are quarantined; these should never be allowed in your repository. You have control over the Repository Firewall's enforcement using actions on your IQ Server policies.
Disabling the Audit and Quarantine Capability
Disabling quarantine will release all quarantined components to your proxy repository. Previously quarantined components are not quarantined again. Only new components are evaluated for quarantine when quarantine is re-enabled.
To disable Audit and Quarantine:
In Nexus Repository, navigate to the Settings menu and select Capabilities under System.
Select the
Firewall: Audit and Quarantinecapability for the target repositoryTo disable Audit -> select
Disable. Quarantine is disabled as wellTo disable Quarantine -> deselect the
Enable Quarantine for RepositorycheckboxSelect
Save