P2 Repositories in Nexus Repository 2
Nexus Repository 2
Note
Only available in Sonatype Nexus Repository Pro. Interested in a free trial? Start here.
Introduction
Nexus Repository Manager supports the P2 Repository format. The P2 repository format is a provisioning platform for Eclipse components. For more information about the P2 repository format, see the Equinox P2 documentation on the Eclipse Wiki.
The following sections detail the procedures for creating and managing P2 repositories.
Nexus Repository Manager Pro has P2 support installed by default. Prior to any usage in Nexus Repository Manager OSS the Nexus P2 Bridge Plugin and the Nexus P2 Repository Plugin need to be installed. You can download the bundle.zip files for your specific version from the Central Repository:
Nexus P2 Repository Plugin
Nexus P2 Bridge Plugin
Extract the two files into sonatype-work/nexus/plugin-repository and restart the repository manager.
Note
P2 processing requires larger amounts of memory. We suggest to increase the configured Java heap memory by increasing wrapper.java.maxmemory to a minimum of 2048. This configuration value can be found in $NEXUS_HOME/bin/jsw/conf/wrapper.conf.
Proxy P2 Repositories
Nexus Repository Manager can proxy a P2 Repository. To create a new proxy P2 repository:
Click Repositories in the Views/Repositories menu.
Click the Add.. button above the list of repositories, and choose Proxy Repository from the drop-down of repository types.
In the New Proxy Repository window,
Select P2 as the Provider.
Supply a Repository ID and a Repository Name.
Enter the URL to the remote P2 repository as the Remote Storage Location.
Click Save.
Figure 14.1, “Creating a P2 Proxy Repository” provides a sample configuration used to create a proxy of the Indigo Simultaneous Release P2 repository.
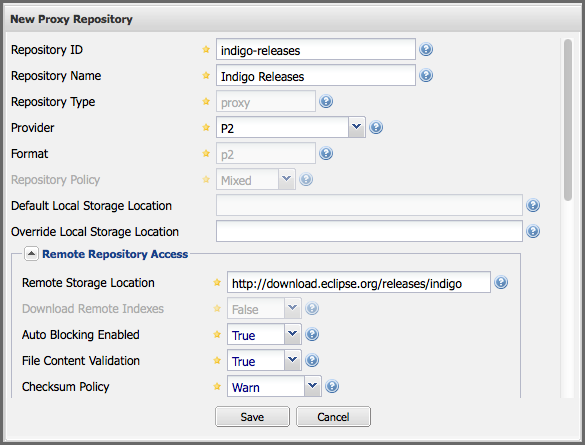 |
Figure 14.1. Creating a P2 Proxy Repository
Grouping P2 Repositories
Just like Nexus Repository Manager can group Maven repositories and OBR repositories, it can also be configured to group P2 Repositories. To group P2 repositories:
Click Repositories in the Views/Repositories menu.
Click the Add.. button above the list of repositories, and choose Repository Group from the drop-down of repository types.
In the New Repository Group window,
Select P2 as the Provider.
Drag and drop one or more P2 repositories into the new group.
Supply a Group ID and a Group Name.
Click Save.
Figure 14.2, “Creating a New P2 Repository Group” shows an example of a repository group that contains two P2 proxy repositories.
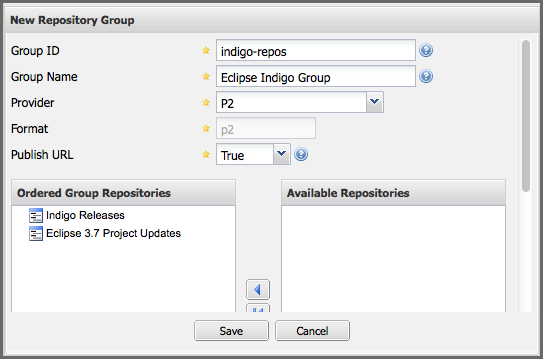 |
Figure 14.2. Creating a New P2 Repository Group