Configuring Upgrade Capabilities on Nexus Repository 2 and 3
Before you can use the Upgrade Wizard, you will need to configure upgrade capabilities on both the Nexus Repository 2 and 3 instances. The instructions below walk you through this process.
Create the Upgrade Capability on the Nexus Repository 3 Instance
1. Under Administration → System → Capabilities, create an Upgrade capability on your Nexus Repository 3 instance.
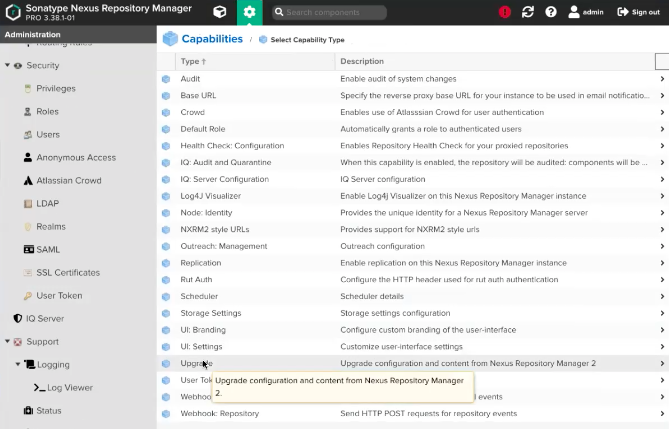 |
2. After selecting the Upgrade capability type, ensure the Enable this capability checkbox is checked, and select Create capability.

3. An Upgrade option now appears at the bottom of your main side menu.
Create the Upgrade Agent Capability on the Nexus Repository 2 Instance
1. In your Nexus Repository 2 instance, navigate to Administration → Capabilities; select the New button under the Capabilities tab to create a new capability.
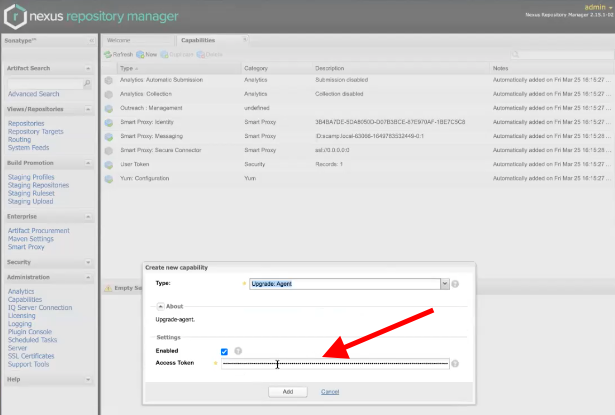 |
2. Select Upgrade Agent as the capability Type.
3. Ensure the Enabled checkbox is selected.
4. You can either keep the generated Access Token or provide your own as shown in the highlighted box above. You will need this access token later when performing the upgrade.
5. Select Add to add the capability.