Configure Nexus Repository 2 Pro Crowd Security
Nexus Repository 2
There are two approaches available to manage what privileges a Crowd user has when they login to Nexus Repository Manager Pro.
Note
Mapping Crowd Groups to Nexus Repository Manager Pro Roles is preferable because there is less configuration is involved overall in Nexus Repository Manager Pro and assigning users to Crowd groups can be centrally managed inside of Crowd by your security team after the initial repository manager setup.
Mapping a Crowd Group to Nexus Repository Manager Pro Role
When mapping a Crowd group to a Nexus Repository Manager Pro role, you are specifying the permissions (via roles) that users within the Crowd group will have after they authenticate.
To map a Crowd group to a Nexus Repository Manager Pro role, open the Roles panel by clicking on the Roles link under the Security section of the sidebar menu. Click on the Add… button and select External Role Mapping as shown in Figure 9.7, “Adding an External Role Mapping”.
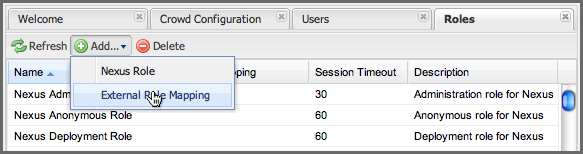 |
Figure 9.7. Adding an External Role Mapping
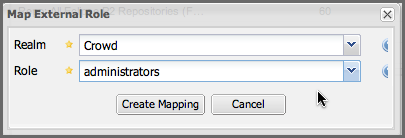 |
Figure 9.8. Mapping an External Crowd Group to a Nexus Repository Manager Pro Role
After choosing the Crowd realm, the Role drop-down should list all the Crowd groups the nexus crowd application has access to. Select the group to would like to map in the Role field and click Create Mapping.
Note
If you have two or more groups in Crowd accessible to the nexus application with the same name but in different directories, the repository manager will only list the first one that Crowd finds. Therefore, Crowd administrators should avoid identically named groups in Crowd directories.
Before saving the group-to-role mapping, you must add at least one Nexus Repository Manager Pro role to the mapped group. After you have added the roles using the Add button, click the Save button.
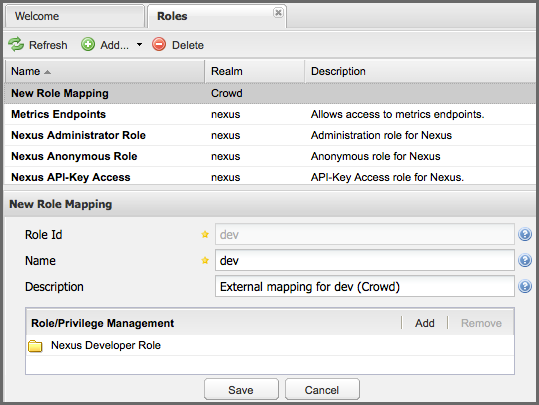 |
Figure 9.9. Unsaved Mapping of External Crowd dev Group to Developers Role
Saved mappings will appear in the list of roles with a mapping value of Crowd, as shown in Figure 9.10, “Mapped External Crowd dev Group to Nexus Developers Role”.
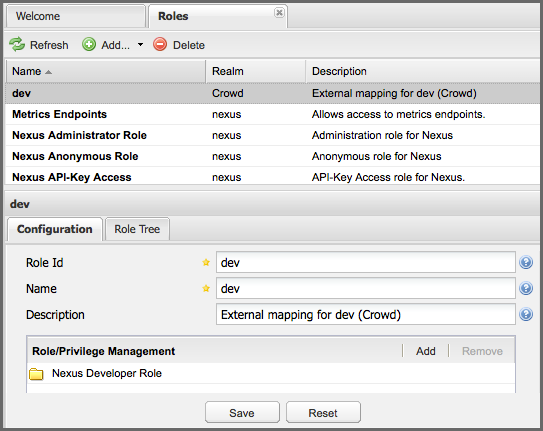 |
Figure 9.10. Mapped External Crowd dev Group to Nexus Developers Role
Mapping a Crowd User to Nexus Role
To illustrate this feature, consider the Crowd server user with an id of brian . As visible in the Crowd administrative interface in Figure 9.11, “Crowd Groups for User "brian"”, the user is a member of the dev group.
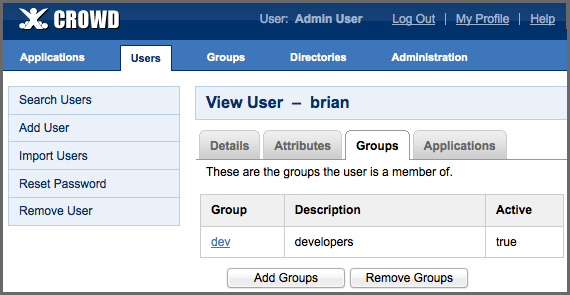 |
Figure 9.11. Crowd Groups for User "brian"
To add an External User Role Mapping, open the Users panel in the repository manager by clicking Users in the Security section of the sidebar menu.
Click on the Add… button and select External User Role Mapping from the drop-down as shown in Figure 9.12, “Adding an External User Role Mapping”.
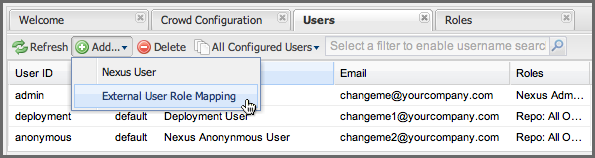 |
Figure 9.12. Adding an External User Role Mapping
Selecting External User Role Mapping will show a mapping panel where you can locate a user by Crowd user id.
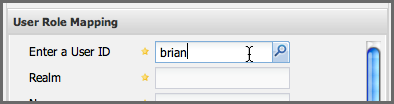 |
Figure 9.13. Locate a Crowd User by User ID
Typing the Crowd user id, in this example brian, in the Enter a User ID field and clicking the magnifying glass icon will cause the repository manager to search for the user ID "brian" in all known realms, including Crowd.
Once you locate the Crowd user, use Add button to add roles to the Crowd User. You must map at least one role to the Crowd managed user in order to Save. Figure 9.14, “Mapped External Crowd User Example” displays the brian Crowd realm user as a member of the dev Crowd group and the mapped role called Nexus Administrator Role. External groups like dev are bolded in the Role Management list.
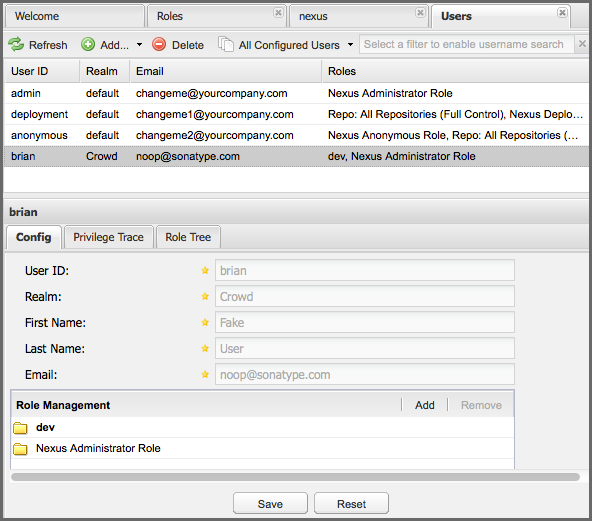 |
Figure 9.14. Mapped External Crowd User Example