Installing Sonatype Nexus Repository Using the OpenShift Operator
Only available in Sonatype Nexus Repository Pro. Interested in a free trial? Start here.
Prerequisites
You must meet the following prerequisites to install Sonatype Nexus Repository using the OpenShift operator:
Running the OpenShift platform with access to RedHat repositories and Administrator privileges
A separate OpenShift project for Sonatype Nexus Repository
A PostgreSQL database accessible to the OpenShift cluster
A Base64-encoded Sonatype Nexus Repository license file; see the following example, which uses an example file named nx-license.lic
$ base64 nx-license.lic
cylwwtYx6Fjh7o4k34Ih3KM.....
Meet the System Requirements for High Availability Deployments.
Storage
The default configuration uses an emptyDir volume for storing Sonatype Nexus Repository logs. However, we recommend configuring dynamic provisioning of persistent storage based on your deployment environment.
Cloud Deployments (AWS, Azure)
Ensure the appropriate Container Storage Interface (CSI) driver(s) are installed for your chosen OpenShift cloud deployment (AWS, Azure).
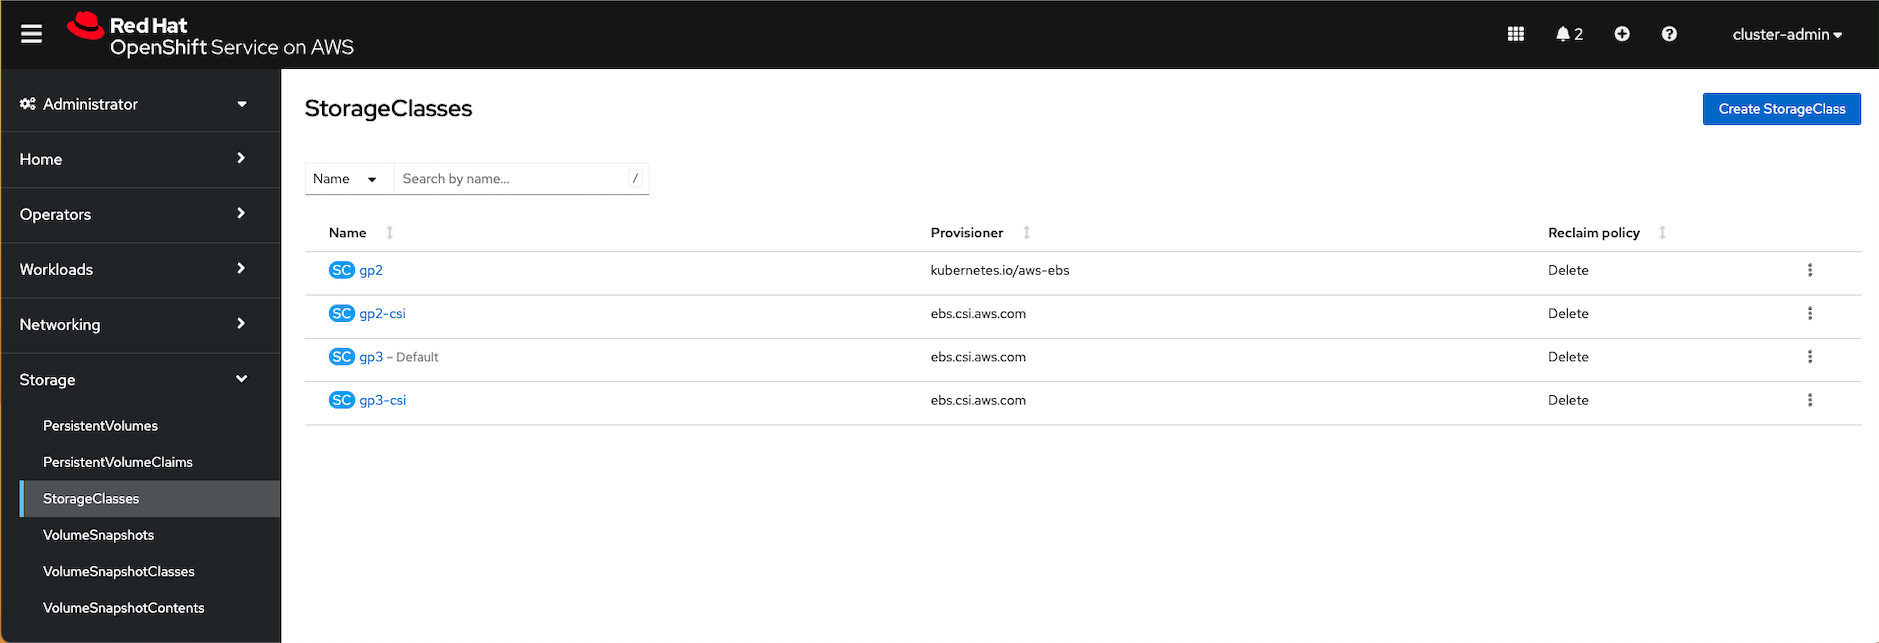
For Red Hat OpenShift on AWS (ROSA), CSI drivers for dynamically provisioning EBS volumes are installed by default; view the storage classes in your cluster web console.
Refer to OpenShift documentation for details on configuring CSI drivers.
On-Premises Deployments
Attach separate disks (i.e., separate from the root disk) to your worker nodes.
Follow the OpenShift local persistent storage documentation and Local Storage Operator documentation to install the Local Storage Operator.
Use the Local Storage Operator to automatically create persistent volumes for your chosen storage class name. See the OpenShift documentation for details.
Configuring the Operator for Dynamic Persistent Volume Provisioning
Set the
nexusData.storageClass.nameparameter to a storage class name. This could be one of the default storage classes automatically created in your OpenShift cluster (e.g., if you're using ROSA) or one that you would like the operator to create.If you would like to create a dedicated storage class (i.e., you don't want to use the default), then in addition to specifying a value for
nexusData.storageClass.name, you must also setnexusData.storageClass.enabledparameter totrue.Set the
nexusData.volumeClaimTemplate.enabledparameter totrue.
Migrating from the Old OrientDB Operator
Note
The old OrientDB operator was sunsetted on December 15, 2023. The new operator is called "Nexus Repository HA Certified Operator."
There is no direct migration path from the old operator to the new operator as the old one used the embedded OrientDB database while the new one requires that you migrate to PostgreSQL.
If you wish to use the new operator, you will need to uninstall the old operator, migrate to PostgreSQL (see Migrating to a New Database), obtain a Pro license, and install the new operator as outlined in the installation instructions below.
Installation Steps
Log into the OpenShift UI as an administrator.
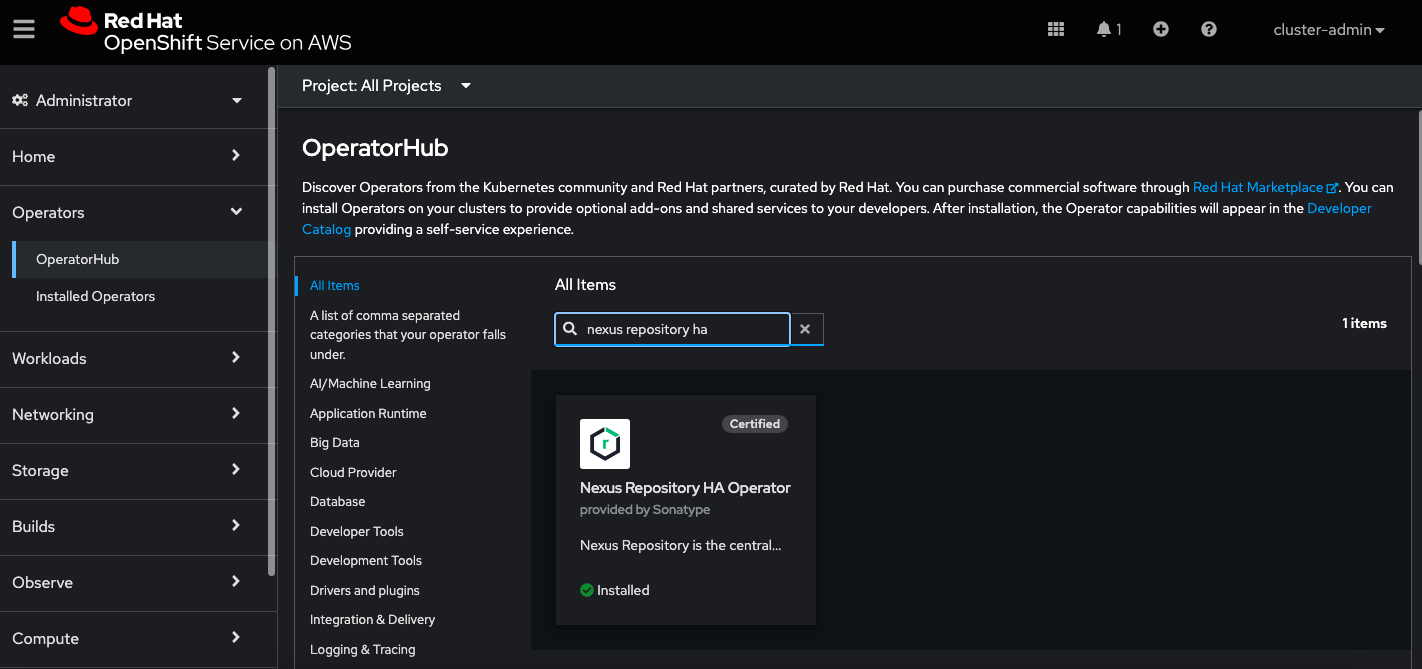
Navigate to Operators → Operator Hub; locate and install (if not already installed) the Nexus Repository HA Operator in an existing or new project.
Complete the remaining steps for the operator to be fully operational.
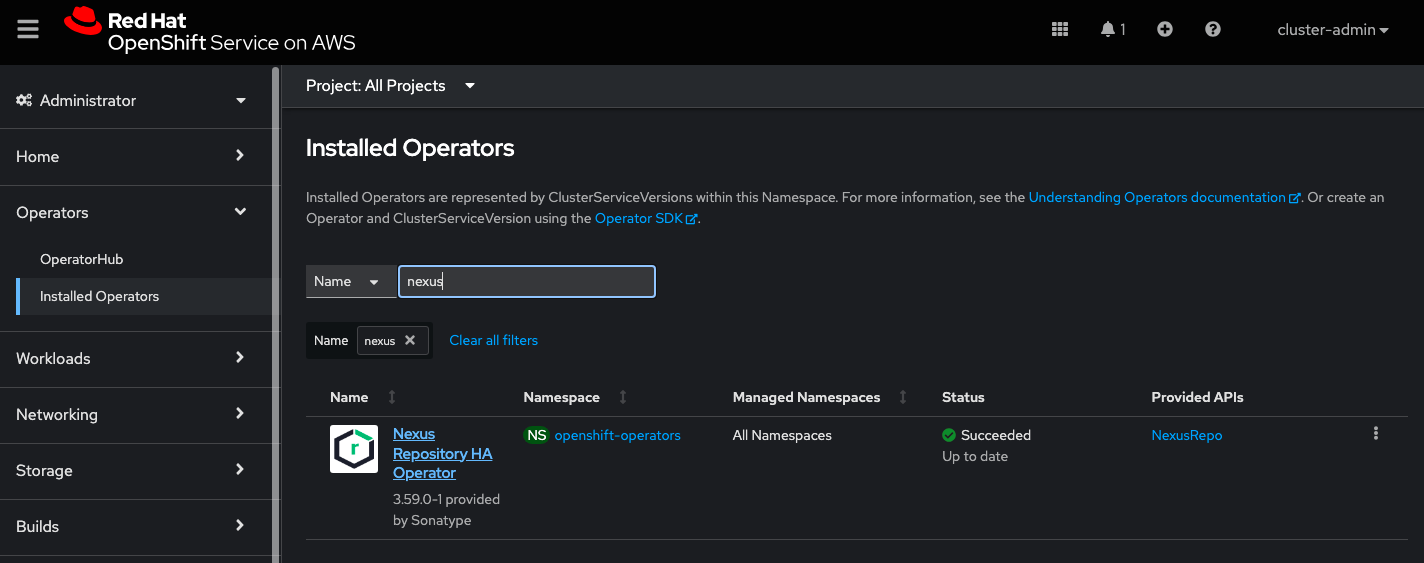
After installing the operator, navigate to Operators → Installed Operators; select the Nexus Repository HA Operator to update the custom resource definitions.
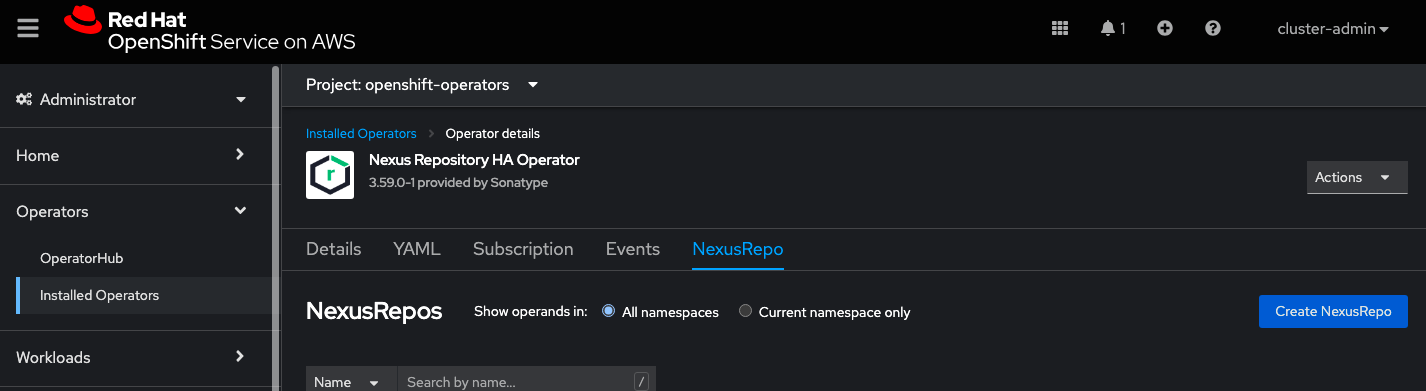
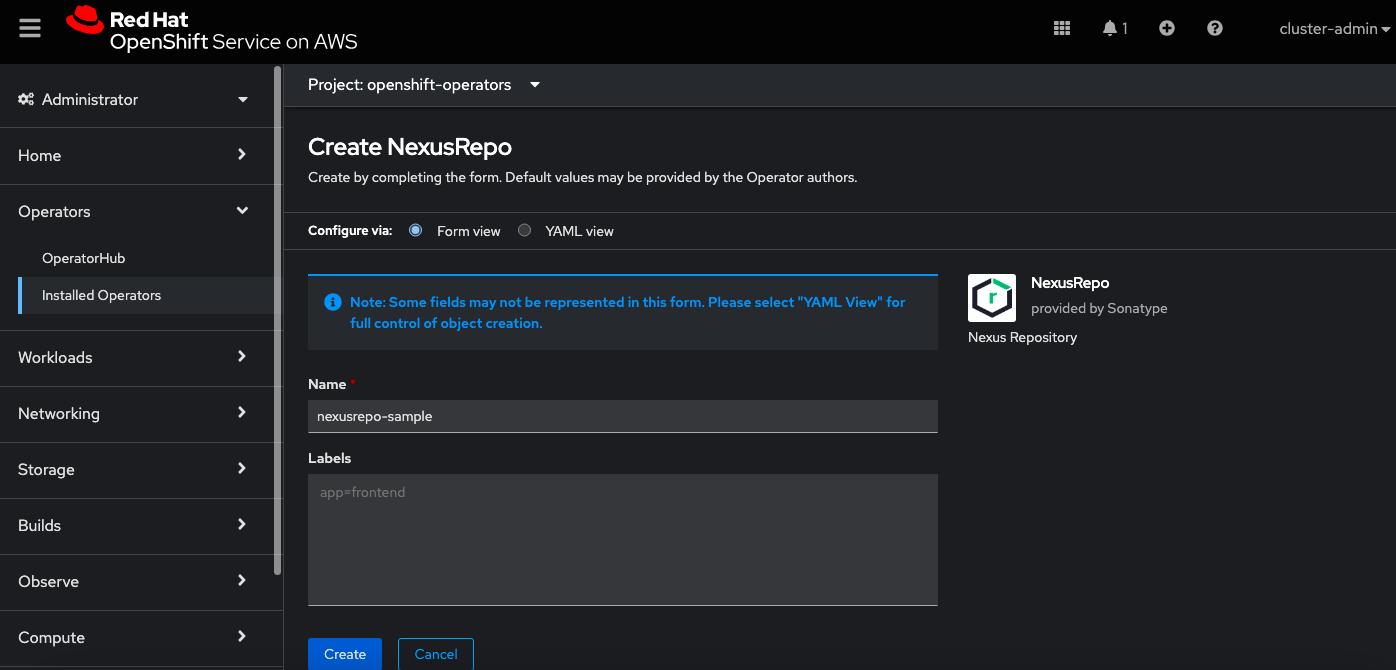
Select the NexusRepo tab; then, select the Create NexusRepo button.
Provide a name for your custom resource definitions or keep the default and select Create.
The custom resource definition now appears in a table under the NexusRepo tab.
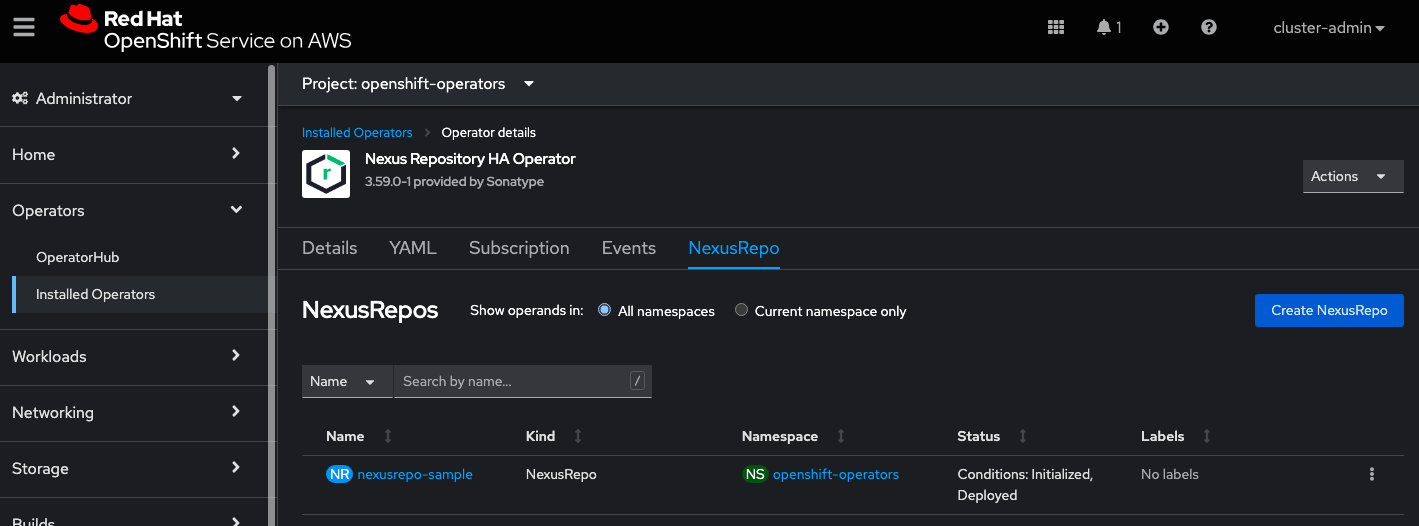
Select the custom resource definition that you just created.
Within the custom resource definition, navigate to the YAMLtab.
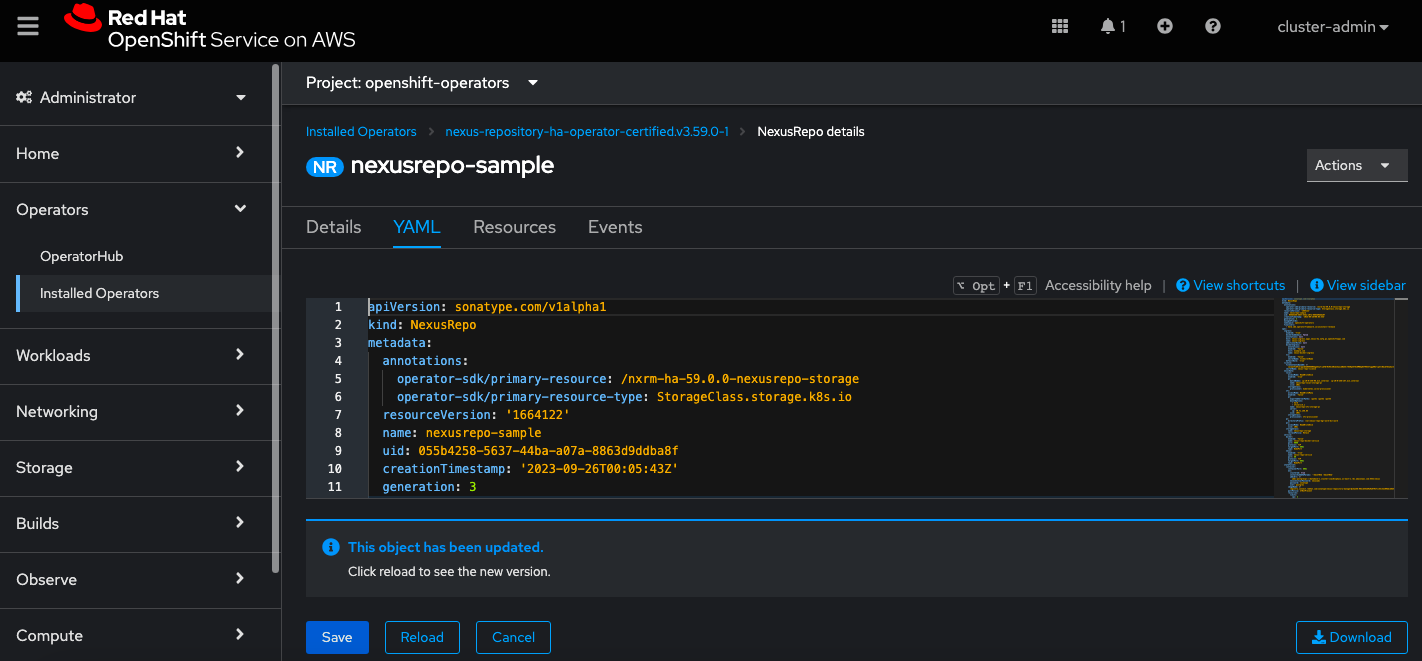
Update the following attributes in the YAML:
Set the following property.
spec.ingress.defaultRule = true
If you will have more than one Docker repository, you will need to either use a reverse proxy or subdomain connector. We recommend choosing one of these methods.
If you use a reverse proxy, you do not need to change anything for
spec.ingress.dockerSubdomainorspec.ingress.dockerIngressfrom their default values. Proceed to step 9d.If you will use a subdomain connector, set the following:
spec.ingress.dockerSubdomain = true
If you will have only one Docker repository and plan to use port connectors, set the following attributes instead:
spec.ingress.dockerIngress.enabled = true
spec.ingress.dockerIngress.host = <desired hostname>
spec.ingress.enabled = true
spec.ingress.host = <prefix name>.<openshift cluster hostname>Use the hostname of your OpenShift cluster with the appropriate prefix
If TLS is required, set the following attributes:
spec.ingress.tls.enabled = true
spec.ingress.tls.secretName = <tls secret name>
Follow Kubernetes's documentation for creating a TLS secret and Ingress
If you have not already done so, convert your license file to Base64-encoded format using a command like the following:
$ base64 <license file.lic>
Add the result of the above command to
spec.license.fileContentBase64If you will be using High Availability (HA), set the following:
spec.statefulset.env.clustered = true
spec.statefulset.env.jdbcUrl = <postgresql-jdbc-url>
spec.statefulset.env.password = <db-password>
spec.statefulset.env.user = <db-username>
spec.statefulset.env.nexusInitialPassword = <intial-admin-password>
spec.statefulset.env.replicaCount =<number-of-instances>
Select Save.
Select Reload.
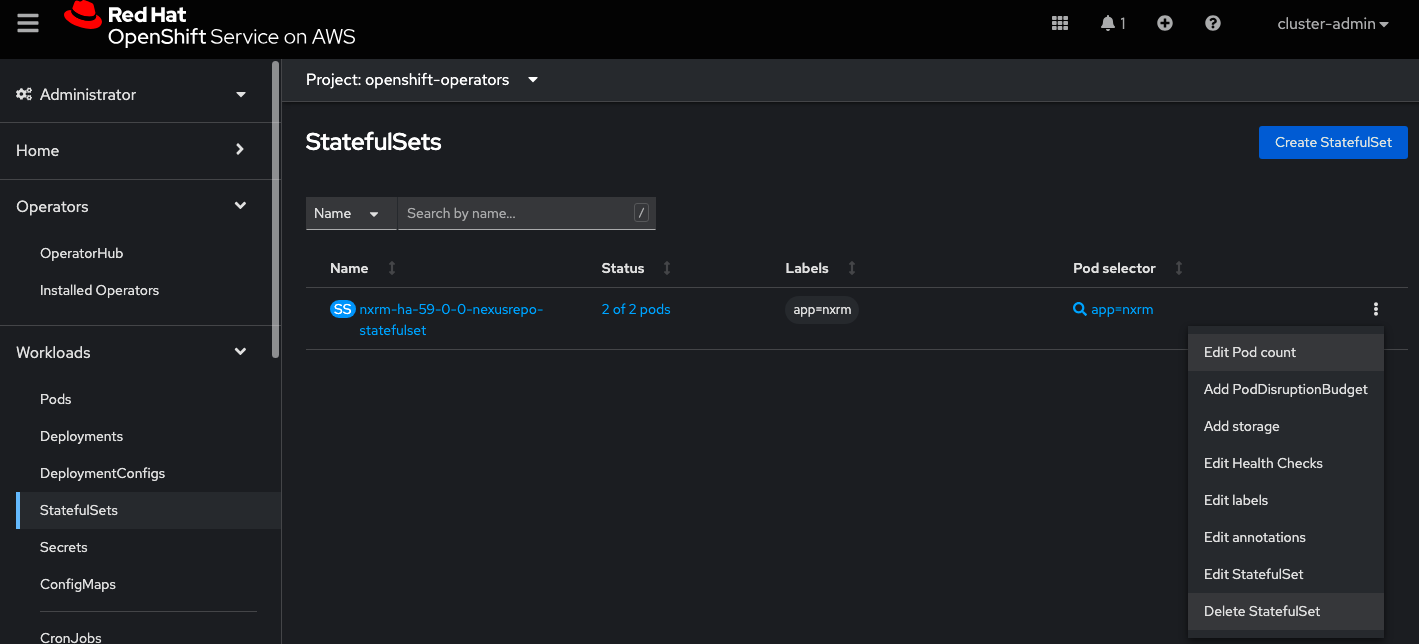
In the OpenShift UI, navigate to Workloads → StatefulSets.
Delete the StatefulSet that is similar to "nxrm-ha-59-0-0-nexus repo-statefulset" (as shown in the example below) to apply the updated configuration.
Note
After the StatefulSet starts again, it will take a few minutes for the pods to be active and running. Proceed to the next step after the pods are running.
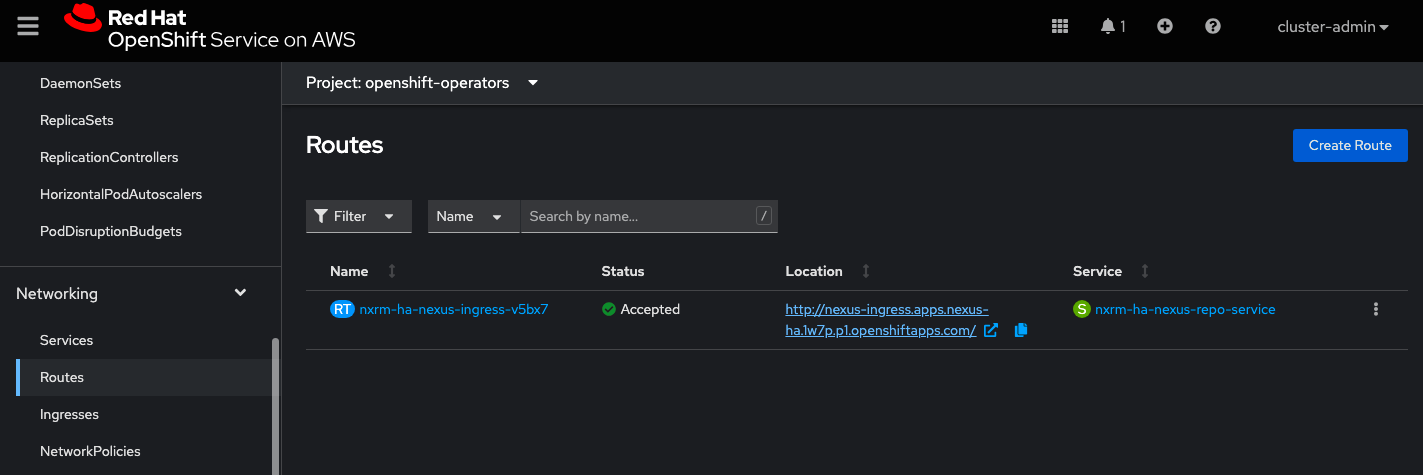
In the OpenShift UI, navigate to Networking → Routes; the URL for accessing your Sonatype Nexus Repository instance appears in the Location column.
Upgrading an OpenShift Operator
Upgrading an OpenShift Operator can be done through the OpenShift console or the command-line interface (CLI). Here's a general guide, but always refer to the specific Operator's documentation for any unique instructions:
Navigate to Installed Operators: In the OpenShift console, go to "Operators" -> "Installed Operators."
Find Your Operator: Locate the Operator you want to upgrade in the list. Operators with available updates will typically show an "Upgrade available" status.
Initiate the Upgrade: Click on the Operator name. On the Operator details page, you'll usually find an "Upgrade" button or a similar option.
Select Channel (If Applicable): Some Operators offer different update channels (e.g., stable, beta). Choose the channel you prefer for the upgrade.
Review and Approve: Review the upgrade details, including the new version number and any release notes. Approve the upgrade to proceed.
Monitor Progress: OpenShift will handle the upgrade process. Monitor the status to ensure the Operator is upgraded successfully.
Important Notes
Operator Documentation: Consult the specific Operator's documentation for the most accurate and up-to-date upgrade instructions.
Backup: It's a good practice to back up your cluster or relevant resources before upgrading an Operator, especially in production environments.
Dependencies: Be aware of any dependencies the Operator might have. Upgrading could affect other components in your cluster. Rollback: Have a rollback plan in case issues arise during the upgrade.
Testing: If possible, test the Operator upgrade in a non-production environment first to identify any potential problems.