Resetting a Nexus Repository 2 to 3 Upgrade
Restarting the servers during the upgrade will require you to restart the upgrade from the beginning. Complete all the steps below to reset the upgrade.
Warning
A brief production outage is required to restart the servers.
When available, use the Abort button in the upgrade wizard in Nexus Repository 3
Shut down Nexus Repository 3
Remove the following from the Nexus Repository 3 data directory (i.e., ${data-dir} directory)
Remove the blob storage path and
${work-dir}/dbwhen OrientDB or H2 are usedDrop and recreate the PostgreSQL database when a PostgreSQL database is used
Reconfigure custom properties in the
${work-dir}/etc/nexus.propertiesfileBlob store storage needs to be reset; when using S3 buckets, they should be cleared out or recreated
Shut down Nexus Repository 2
Remove the entire Nexus Repository 2 directory at
${work-dir}/db/migrationagentRestart Nexus Repository 2
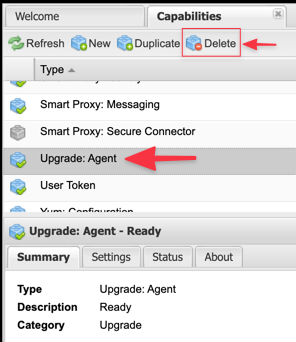
Delete the Upgrade: Agent capability from Nexus Repository 2 → Administration → Capabilities

This will remove internal scheduled tasks for the upgrade.
Start a new upgrade when ready by re-configuring the upgrade capabilities.